In the Security User edit form, the following fields are contained in the group box labeled "User":
User Type

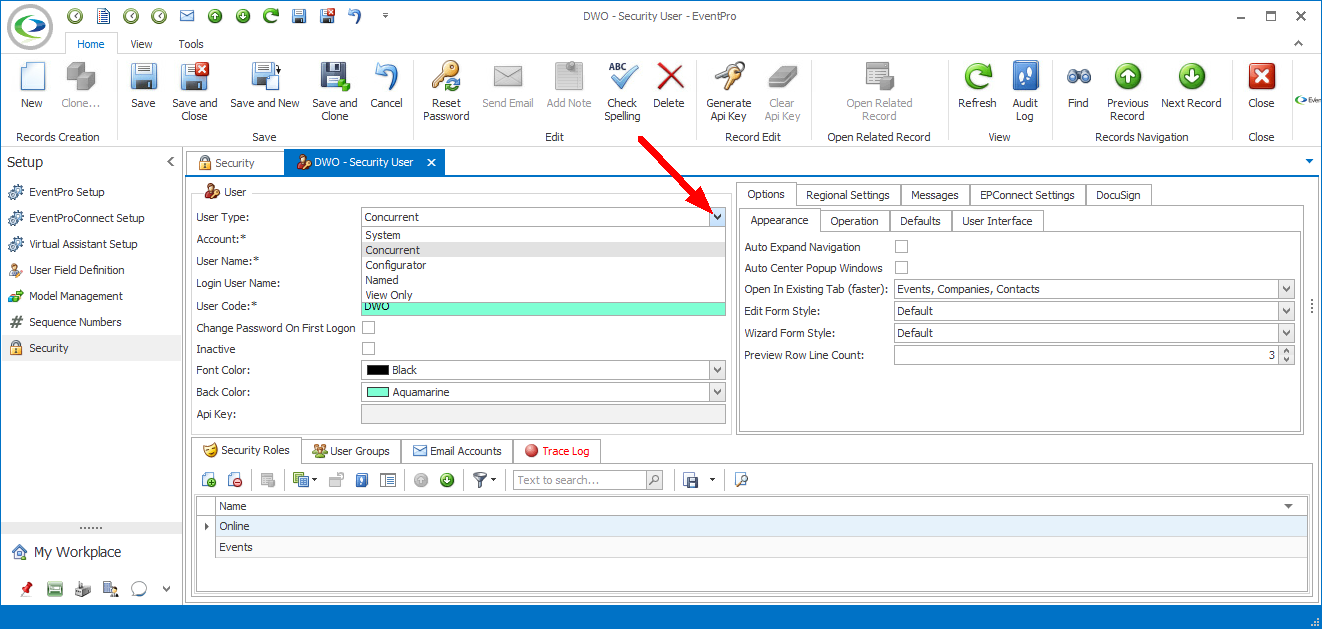
Figure 1043: Selecting User Type
Select the relevant User Type from the drop down list:
•System
•Concurrent
•Configurator
•Named
•View Only
System
The System type is used by VirtualAssistant and EPConnect Setup.
If this User is going to be the VirtualAssistant User or the EPConnect Anonymous Login User, you must set the User Type to System. Review the topics VirtualAssistant User and EPConnect Anonymous Login User.
Note, however, that other than the EPConnect Anonymous Login User, a System-type User cannot login to EPConnect.
A System User does not count against your licensed user count.
Concurrent
Concurrent is the standard application user type.
Concurrent Users are able to log into EPConnect, if other requirements are met. Review the topics Linked Account, Online Security Role, and Available Online.
A Concurrent user counts against your licensed user count.
Configurator
A Configurator User has the ability to make sweeping layout customization changes in the program, since logging in as a Configurator and importing settings will change settings for all users.
The system does not allow you to have more than one Configurator User.
You can disable or delete the Configurator; it is not necessary to have a Configurator User.
A Configurator User does not count against your licensed user count.
Named
The Named type is used for Cloud users and Local installs that use Windows Authentication for automatic application logins.
Named Users are able to log into EPConnect, if other requirements are met. Review the topics Linked Account, Online Security Role, and Available Online.
A Named User counts against your licensed user count.
View Only
The View Only type is used for observer users who cannot make changes to the system or run reports.
A View Only User cannot log into EPConnect.
A View Only User does not count against your licensed user count.
Account
You can link a User to an Account, i.e. a Contact or Company created in your CRM. Review the topics Contact and Company.
If you intend for this User to log into EPConnect, you are required to link the User to an Account
You are also required to link the User to an Account if it is for the EPConnect Anonymous Login User or VirtualAssistant User. Review the topics EPConnect Anonymous Login User and VirtualAssistant User.
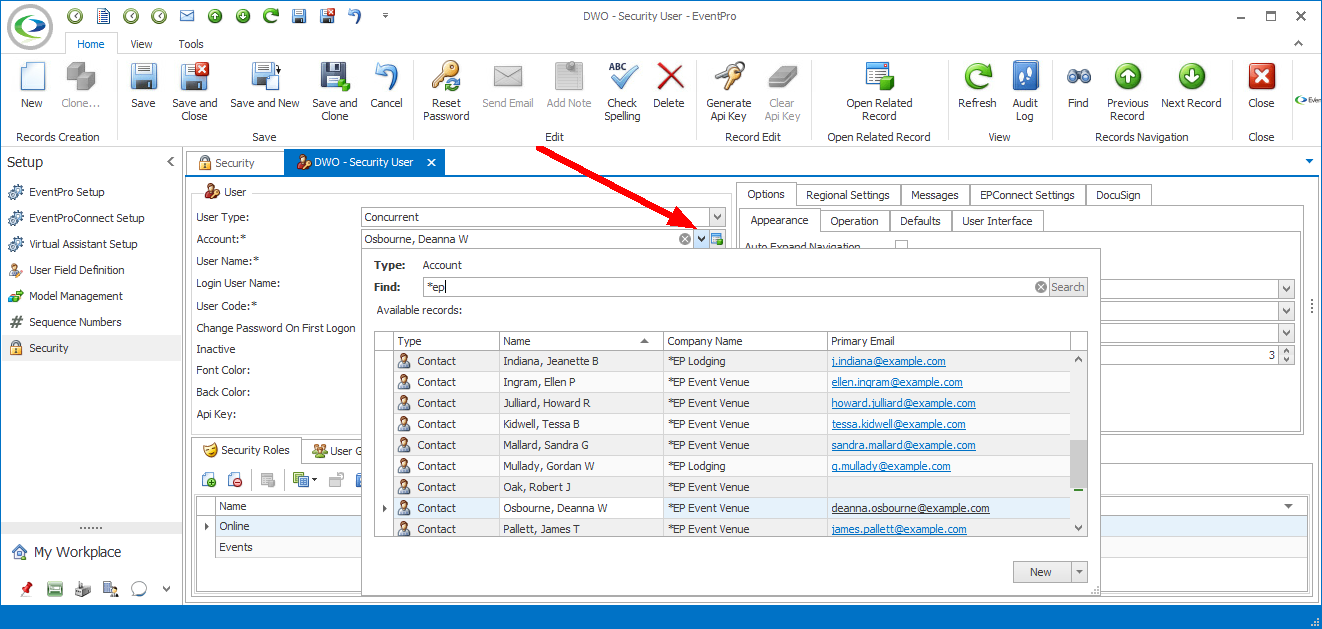
To select an Account, click the arrow to open the Account drop-down.
If the Account already exists, type a search term in the Find field and click Search. Select the relevant Account from the results in the selection grid.
If the Account has not yet been created, you can click the New button at the bottom of the drop-down to start a new Company or Contact on the fly.

Figure 1044: Linking User to Account
User Name, Login, and Code
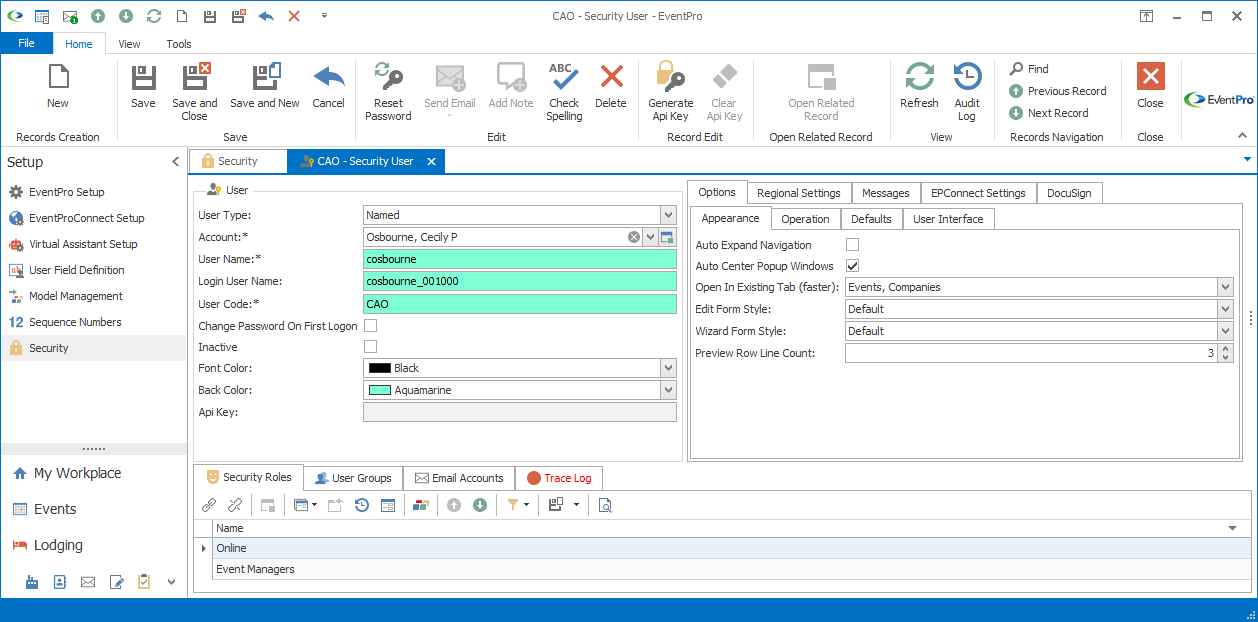
User Name: Enter the user's User Name.
Login User Name: This view-only field displays the Login User Name, which is automatically created from the User Name entered above. You cannot edit the Login User Name directly, but it will change if you edit the User Name above.
User Code: The User Code will initially default to match the User Name, but you can edit it, if you prefer. The User Code is how the person will be identified in the system, e.g. when assigned to tasks, in event roles, etc.
Change Password on First Logon
If you are creating a new user, select this checkbox so that the user can set their password when logging in for the first time.
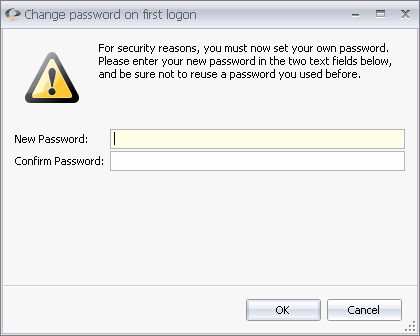
When the user logs in for the first time, the dialog in Figure 1045 appears.

Figure 1045: Change Password on First Logon
Alternatively, you could reset the password after saving the User edit form. That process will be covered under the topic Save, Reset Password and Close.
Inactive
You would mark a User as "Inactive" if they are no longer using EventPro, but you want retain their related records. However, you typically wouldn't create a new user just to immediately mark them as Inactive. For editing a user, including setting them to Inactive, see the topic Edit User.
Font Color and Back Color
Select the font and background color for this User when displayed in fields or selection grids.

Figure 1046: Security User Edit Form