A Lobby Display is a web page that displays a scrolling list of Events, Event Locations, or Attendee Functions in user-defined columns. You can view examples below in this topic.
There are 3 main steps to creating an online Lobby Display, which are described below:
1.Create a Lobby Display Security User.
2.Set up the Lobby Display Area Definition:
c.Grid
3.Build a direct URL to the Lobby Display.
Create Lobby Display Security User
The first step to setting up a Lobby Display is ensuring that you have a Security User set up for Lobby Display purposes.
You can follow the instructions under Security Setup / Users / Create New User to create and/or edit a Security User.
In particular, ensure that the Lobby Display Security User has these 3 key settings:
•Online Permissions: The User must be assigned an Online-type Security Role.
•Available Online: The User's "Available Online" checkbox must be selected under EPConnect Settings.
•Linked CRM Account: The User needs to have a linked CRM Account.
Take note of this Security User's User Name and Password, as you will probably need them for the Lobby Display direct URL later.
Lobby Display Area Definition
To review how to add, edit, and delete an Area Definition, see Area Definitions: Add, Edit, Delete.
These instructions will begin from the opened Lobby Display - Area Definition edit form.
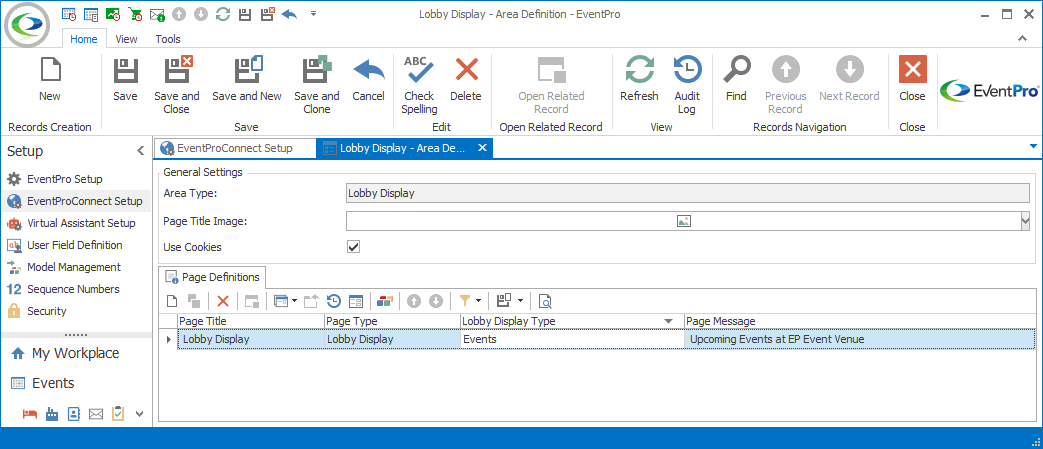
Figure 694: Editing Lobby Display Area Definition
The common settings in this Area Definition are described in the topic General Settings under Area Definition: Add, Edit, Delete.
Use Cookies
This setting is unique to the Lobby Display Area Definition.
If you select this checkbox, the Lobby Display will save login information into a cookie so that the user won't need to log in a second time.
If you want the user to log in each time, do not check this checkbox.
Lobby Display - Page Definition
There is only one type of Page Definition in the Lobby Display - Area Definition edit form: Lobby Display.
To review how to add, edit, or delete a Page Definition within an Area Definition, see Page Definitions: Add, Edit, Delete.
These instructions will begin from the opened Lobby Display - Page Definition edit form.
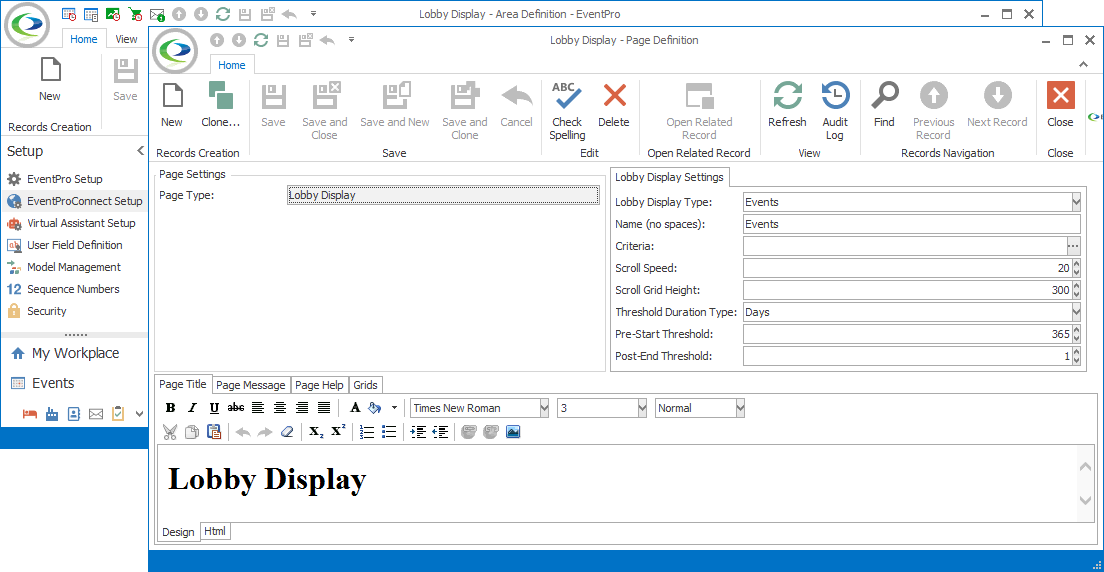
Figure 695: Editing Lobby Display Page Definition
The Lobby Display Settings are unique to the Lobby Display - Page Definition.
Lobby Display Type
Under the Lobby Display Settings tab, choose the Lobby Display Type: Events, Event Locations, or Attendee Functions.
Name
This Name will be part of the direct URL leading to the Lobby Display, so it needs to meet these three requirements:
•Have a unique name
•Be case sensitive
•Contain no spaces
Criteria
You can set Criteria to filter the Events and Event Locations listed in the Lobby Display.
•For example, you could filter an Event Lobby Display to show only Events of a certain category, or belonging to a certain Event Manager.
•In another example, you could filter an Event Location Lobby Display to only show certain Venue Locations, or Booked Locations of a certain Status.
1.To create a filter, click the ellipsis to the right of the Criteria field.
2.The Edit Criteria window opens.
3.Construct your filter conditions as required. You can review Common Procedures / Construct Filters for additional assistance.
4.When you are done with the Edit Criteria window, click OK.
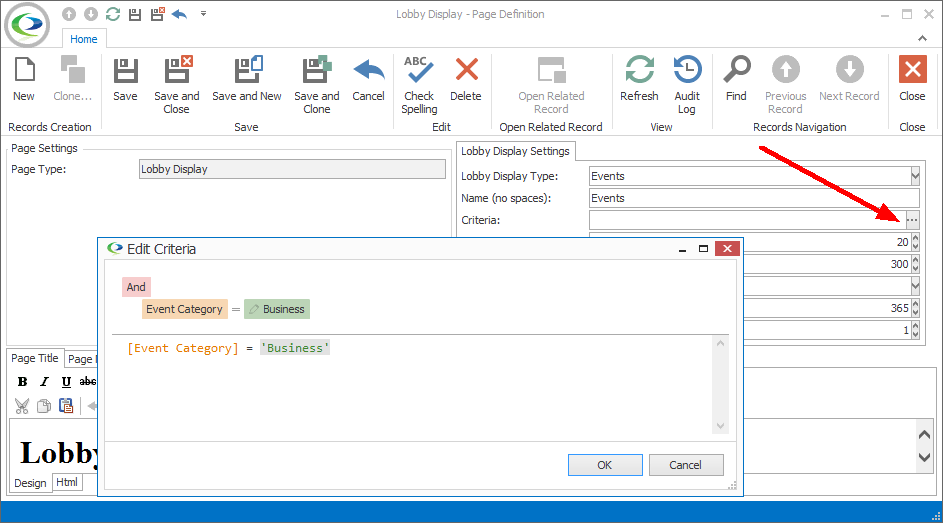
Figure 696: Editing Lobby Display Criteria
Scroll Speed and Scroll Grid Height
You can adjust the Scroll Speed and Scroll Grid Height to your preferences.
Thresholds
These Threshold fields determine when an Event/Location/Function will start and stop appearing in the online Lobby Display.
•Threshold Duration Type: Select the unit of measurement for the Threshold numbers: Minutes, Hours, or Days.
•Pre-Start Threshold: This number determines how far in advance of its start the Event/Location/Function will appear in the Lobby Display.
oFor example, if an Event Location is scheduled to start at 3:00 pm today, and the Event Location Lobby Display's Pre-Start Threshold is set to 2 Hours, that Event Location will start appearing in the Lobby Display at 1:00 pm.
oIf an Event Lobby Display's Pre-Start Threshold is set to 10 Days, an Event will start appearing in the Lobby Display ten days before the Event starts.
•Post-End Threshold: This number determines how long after its end the Event/Location/Function remains in the Lobby Display before disappearing.
oFor example, if an Event Location is scheduled to end at 5:00 pm today, and the Event Location Lobby Display's Post-End Threshold is set to 1 Hour, that Event Location will continue to show on the Lobby Display until 6:00 pm.
oIf an Event Lobby Display's Post-End Threshold is set to 2 Days, an Event continues appearing in the Lobby Display for two days after the Event ends.
Grid
Three of the tabs at the bottom of the Lobby Display - Page Definition edit form are the common tabs described earlier (Page Title, Page Message, and Page Help). Review the topic Common Page Tabs.
Under this Grids tab, you will find the Lobby Grid. As with all EPConnect grids, the Lobby Grid will be hard-coded for the Page Definition, meaning that you can't delete it or add another. However, you can customize the Columns that are displayed in the grid, and determine the sort order of the records.
To review how to add, edit, and delete columns, see Grid Columns: Add, Edit, Delete.

Figure 697: Editing Event Lobby Grid
When defining Columns, you can review the common settings described in the topic Common Column Settings.
The available columns will vary, depending on which Lobby Display Type you selected above, although the process for adding and defining those fields will be essentially the same.
To review some of the most common settings for grid columns, see Grid Columns: Add, Edit, Delete. For Lobby Display grids, you may want to pay particular attention to the explanations about Grouping and Sorting, as well as Width and Date Time Type.
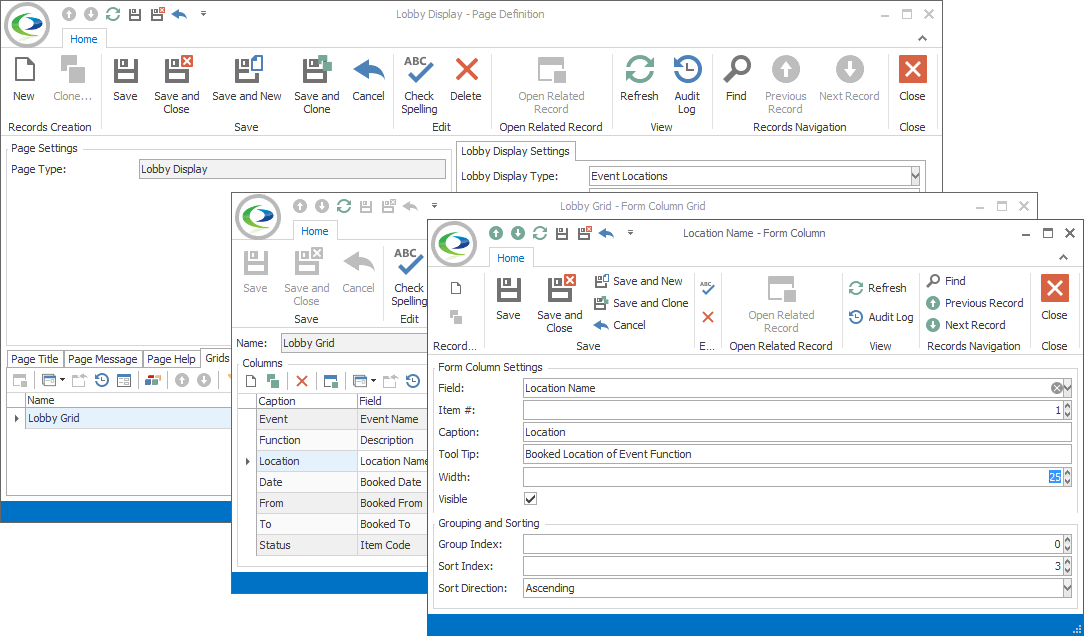
Figure 698: Editing Event Location Lobby Grid
When you are done defining the Lobby Grid, ensure that you save all of your changes, from the Grid edit form, back to the Area Definition edit form.
Build Lobby Display Direct URL
The Lobby Display area of EPConnect is only accessed by direct link, so you will build a URL to the Lobby Display by adding Automatic Login and Page Redirection parameters to your EPConnect URL.
The actual URL will vary, depending on your application, network, User ID, region, and other factors, but the use of parameters will be essentially the same.
Example 1
This is a URL example for EPConnect connected to a Cloud EventPro application.
The URL uses the following sample parameters: Lobby Display's Name = MainLobby, Client ID = 000000
It also includes the login credentials for a Lobby Display User, as described above: User Name = LobbyDisplay, Password = lobby
https://connect.eventpro.net/ep/client/DB000000?User=LobbyDisplay&Password=lobby&Page=LobbyDisplay&Name=MainLobby
Example 2
This is a URL example for EPConnect connected to an On-Prem (network/desktop) EventPro application
The URL uses some of the same sample parameters as above (Lobby Display's Name = MainLobby, Client ID = 000000), but does not pass the User and Password.
If the User and Password are not passed in URL, the User will be prompted to log in, which will only happen the first time if the Use Cookies option is turned on.
https://example.com/EventProConnect/Default.aspx?Page=LobbyDisplay&Name=MainLobby
EPConnect Lobby Display Examples
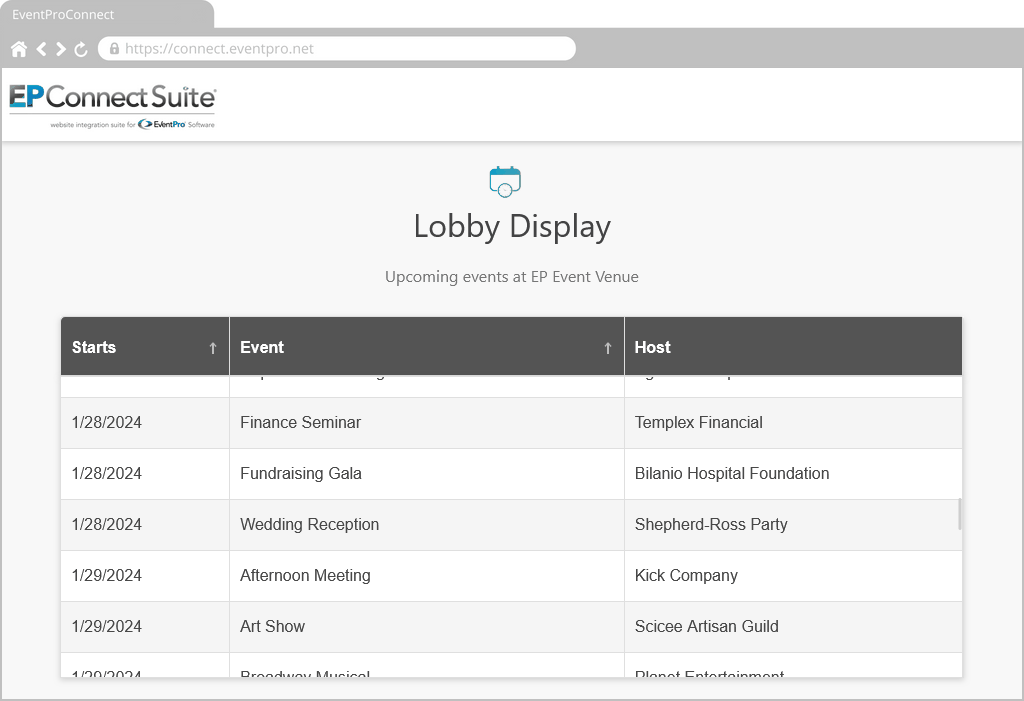
Figure 699: Event Lobby Display in EPConnect
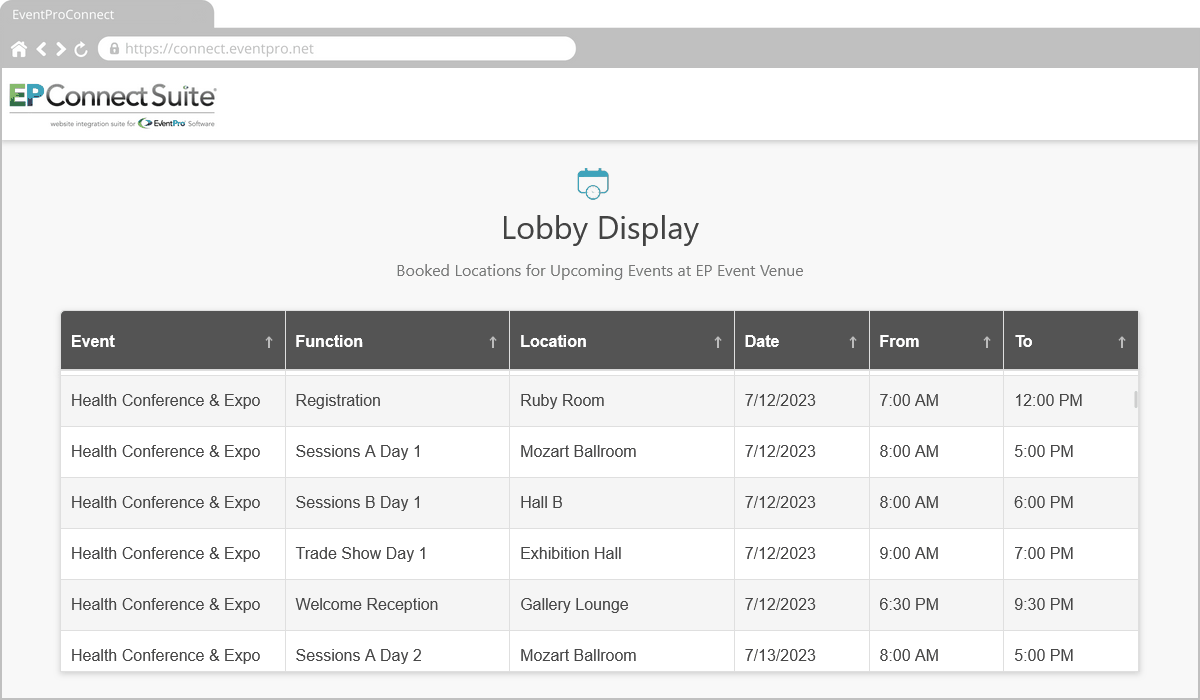
Figure 700: Event Location Lobby Display in EPConnect
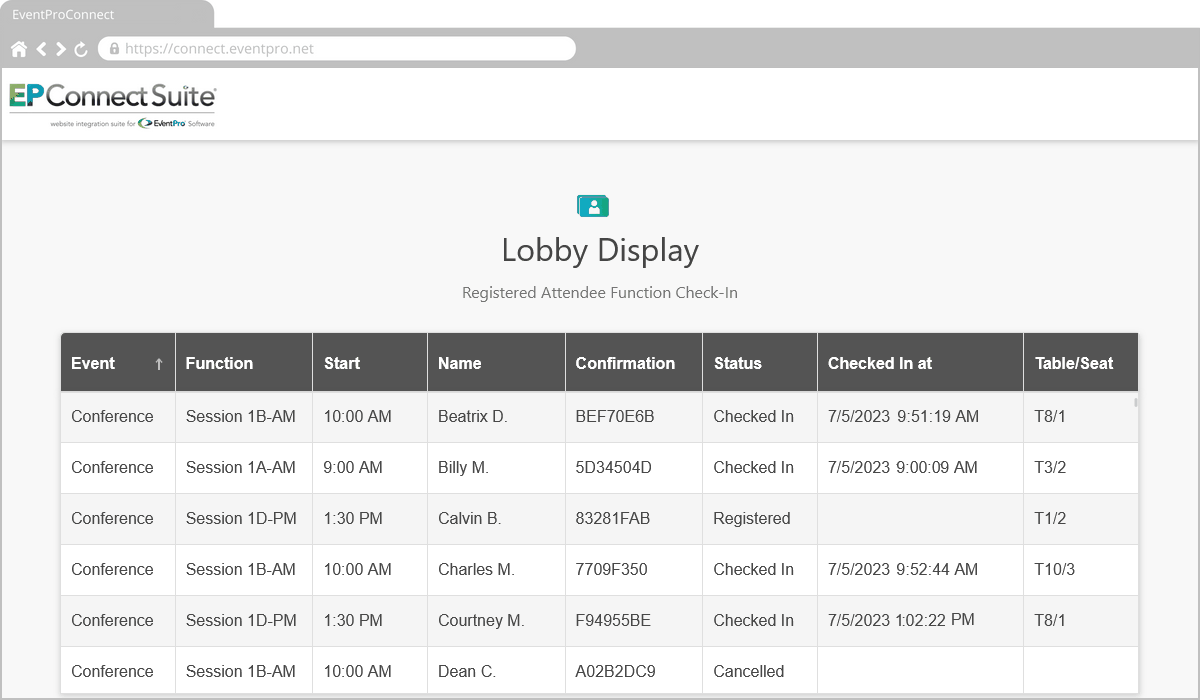
Figure 701: Attendee Function Lobby Display in EPConnect