•Staffing is unique in that it can be added to a specific Event Location or to the entire Event.
•Unlike Setup, Catering and Beverage event resources, which must be linked to a particular Event Location, Staffing Items only need to be linked to a time in the Event, since a staff member could - depending on circumstances - attend several Booked Locations in the Event during one shift.
•This topic describes how to add a Staffing Item to an Event Location. If you want to add a Staffing Item to an event without assigning the staff worker to a particular location, please refer to Add Staffing to Event.
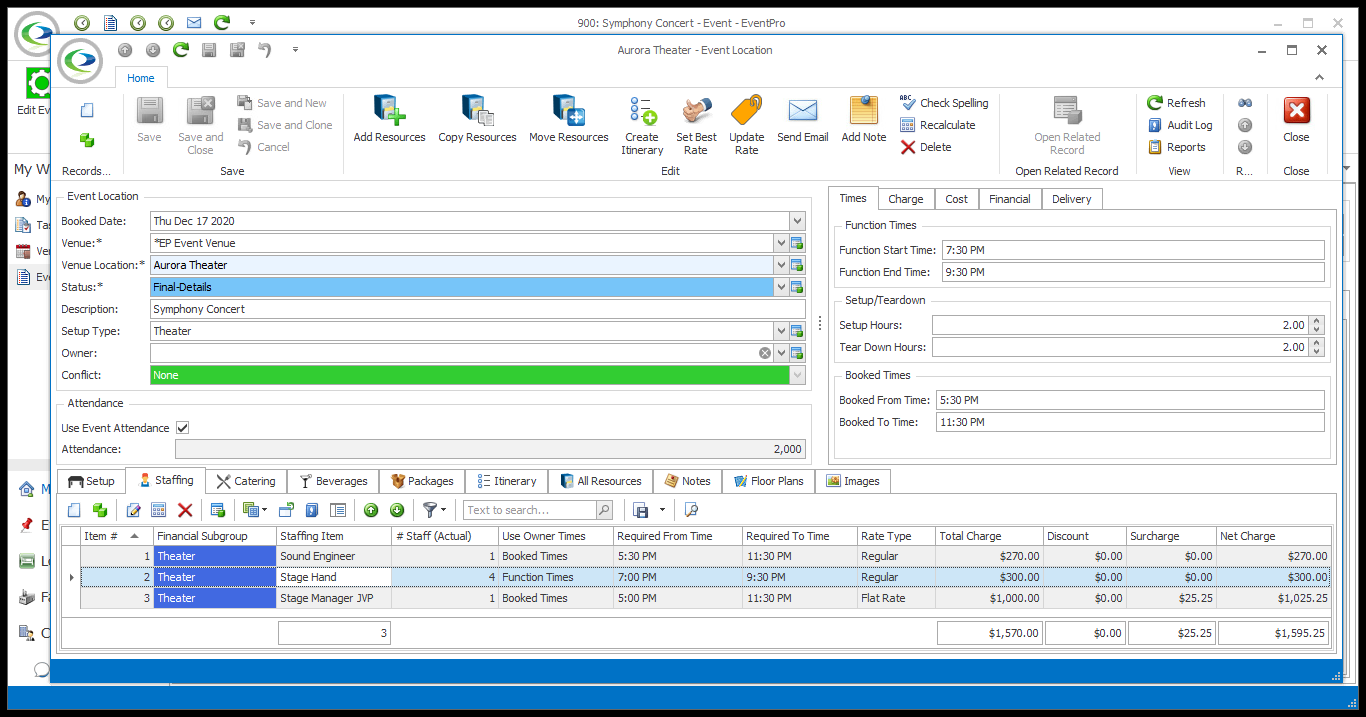
1.At the bottom of the Event Location edit form, select the Staffing tab.
2.Start a New record under the Staffing tab.
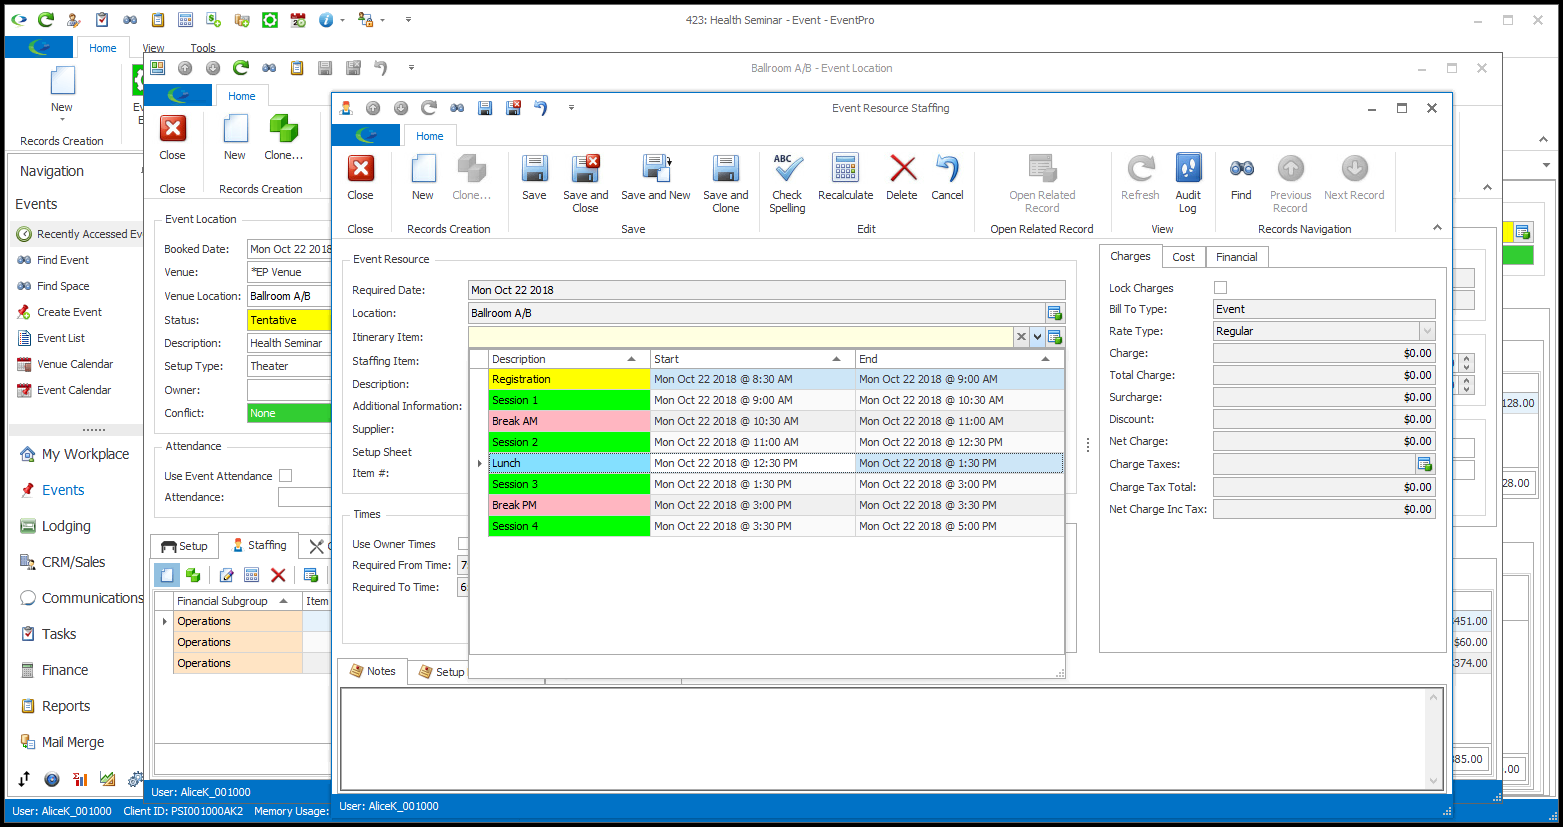
3.The Event Resource Staffing edit form opens.

4.The Location will already be set to the Event Location.
5.The Itinerary Item field will only appear if there is an Itinerary set up for the Event Location. If there are no Itinerary Items set up on the Event Location, you won't see this field.
If you want to assign the Staffing Resource Item to a specific Itinerary Item within the Event Location, select that Itinerary Item from the drop-down. See also Organize Event Itinerary > Add Custom Itinerary > Itinerary Resources.
6.Select the Staffing Resource Item you want to add from the Staffing Item drop-down. The Staffing Item drop-down is populated by the items created under EventPro Setup > Resources > Staffing.
7.If you can't find a certain Staffing Item in the drop-down list, remember that some Staffing Items may only be available in Applicable Venue Locations, and you will not be able to add those particular Staffing Items to non-applicable locations. See EventPro Setup > Resources > Staffing Item > Applicable Venue Locations.
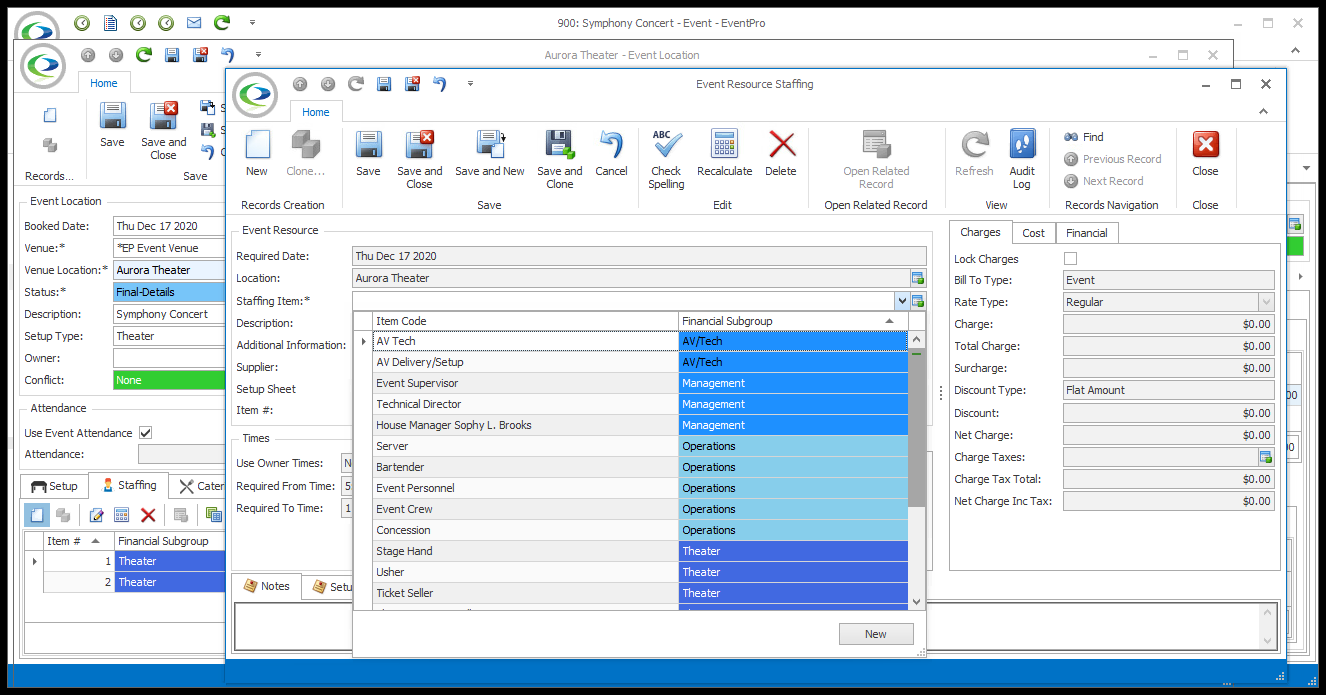
8.The fields in the Event Resource Staffing edit form will default to the information defined for this Staffing Item under EventPro Setup > Resources > Staffing.
9.If you want to customize the Staffing Item for this event booked location, you can do so here in the Event Resource Staffing edit form. The changes you make to the Item here, in the Event Location, will not affect the Item back in Resource Setup.
10.To review how to edit the various fields in a Staffing resource item, refer to the instructions under EventPro Setup > Resources > Staffing.
11.These are some examples of common adjustments made when adding resources to a booked location:
a.Item #: The Item # represents the item’s position in the list of items on selection grids and on printed reports. If you want this item to appear higher or lower, you can enter a new Item #.
Whether the Item # defaults to 0 (zero) or the next number in the sequence depends on the "Auto-Increment Resource Item Sort Orders" system setting under EventPro Setup > Resources > Resources System Settings.
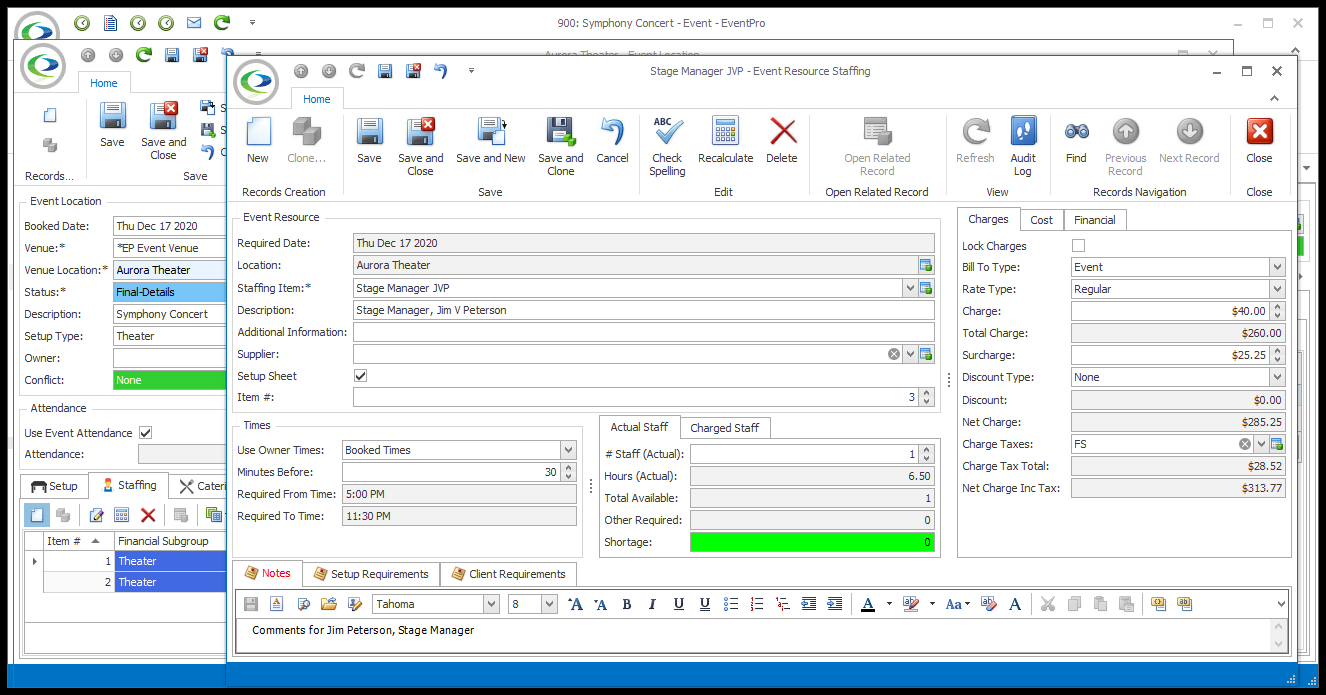
b.Times: Depending on the Default Times of the item in Setup, and the Use Setup Resource Times for Event Resources System Setting, the Times may default to certain options. When adding the item to a booked location, you can change the time selections and/or manually enter the required times, if you wish.
i.One of the "Use Owner Times" options - Function Times or Booked Times, possibly with a certain number of Minutes Before.
ii.The default Required From Time and Required To Time manually set in Setup.
iii.Even if there are default times set for this item, the Use Setup Resource Times for Event Resources system setting determines whether the item always uses the Setup Default Times, never uses them, or prompts you to choose each time.
c.Actual Staff/Charged Staff:
i.If you require more than one worker of this Staffing Item, you can indicate the actual number of staff required under # Staff (Actual). The Hours (Actual) will adjust according to the Required Times.
ii.If you want to charge for a different number of staff or hours than actually used, you can enter those numbers under the Charged Staff tab, in # Staff (Charged) and Hours (Charged).
d.Lock Charges: Selecting the Lock Charges checkbox will lock the charges at the set amounts.
e.Bill to Type: This will default to Event, Pre Paid, or Not Billable, depending on the default selection in Staffing Setup. You can, however, change your selection here.
f.Charges & Cost:
i.Staffing Items can have up to four defined rates (three hourly - Regular, Overtime 1, Overtime 2 - and a Flat Rate). A default Rate Type will be selected, according to the item's Setup. Depending on the circumstances, you may need to select a different Rate Type.
ii.To make other changes to the charges or cost fields, review EventPro Setup > Resources > Staffing Item > Charge & Cost.
g.Discount: If permitted for this Setup item, you may want to add a Discount.
i.Discount Type: Choose the type of discount you want to apply: None, Flat Amount, Percentage, To Cost.
ii.Discount Percentage: If you chose Percentage, enter the percentage number here. The discount amount will be rounded according to the Discount Rounding setting for this item in Setup.
iii.Discount: If you chose Flat Amount, enter the discount amount here.
h.Financial: In Staffing Setup, defaults would have been set for Budget Items and other fields under the Financial tab, but you can make changes as required.
i.Notes: There may already be notes under the Notes and Setup Requirements tabs, if notes were entered for the Setup Staffing Item. You can add or edit notes for the purposes of this event.
You can also now add notes specific to the Event Client under the Client Requirements tab.
12.When the Event Staffing item is adjusted to your satisfaction, click Save and Close in the Event Resource Staffing edit form to return to the Event Location edit form.
13.In the Event Location edit form, the Staffing item will be added under the Staffing tab.