•Now that you have added Hotel Room Groups, and possibly Room Subgroups (depending on how you want to organize your Hotel Rooms), you can add Rooms.
1.There are a few different ways you can start a new Room record:
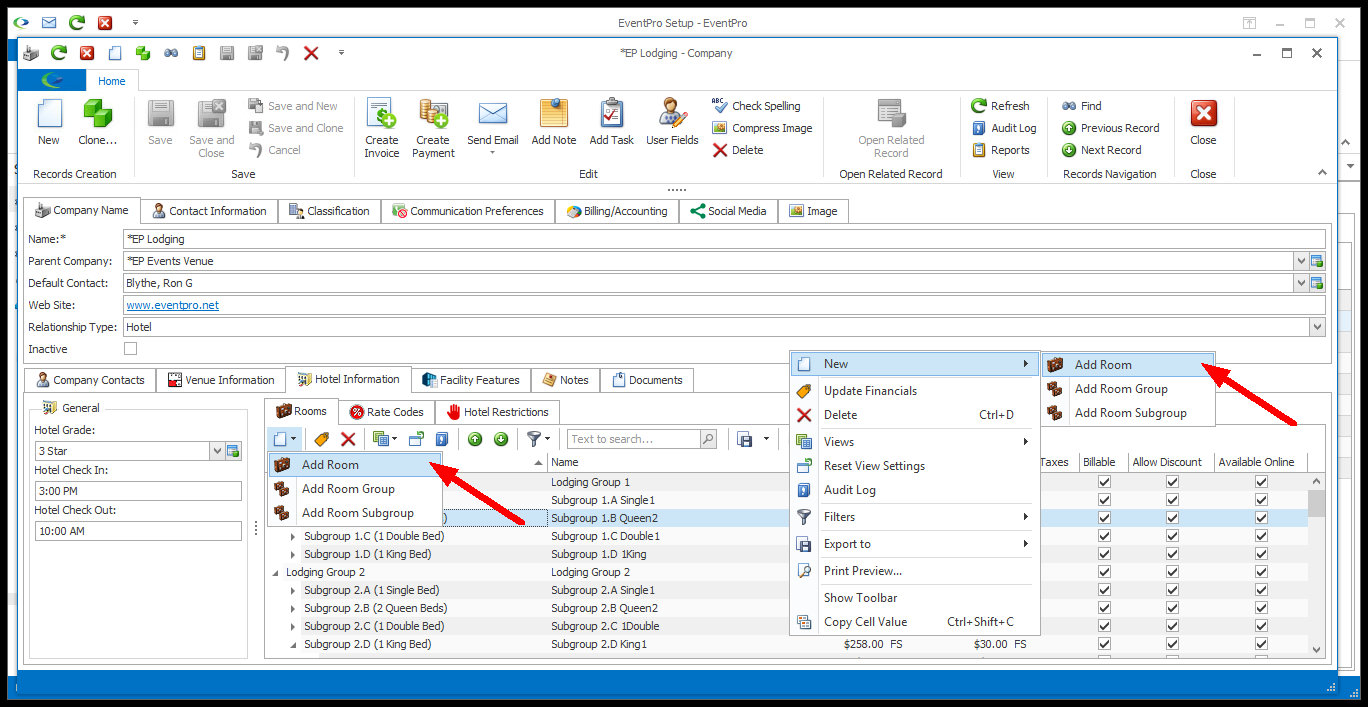
a.Under the Hotel Information > Rooms sub-tab of the Hotel/Company edit form, click on the Room Group or Room Subgroup record to which you want to add a Room.
Click New > Add Room above the selection grid. You can also right-click the Group or Subgroup and select New > Add Room from the speed menu.
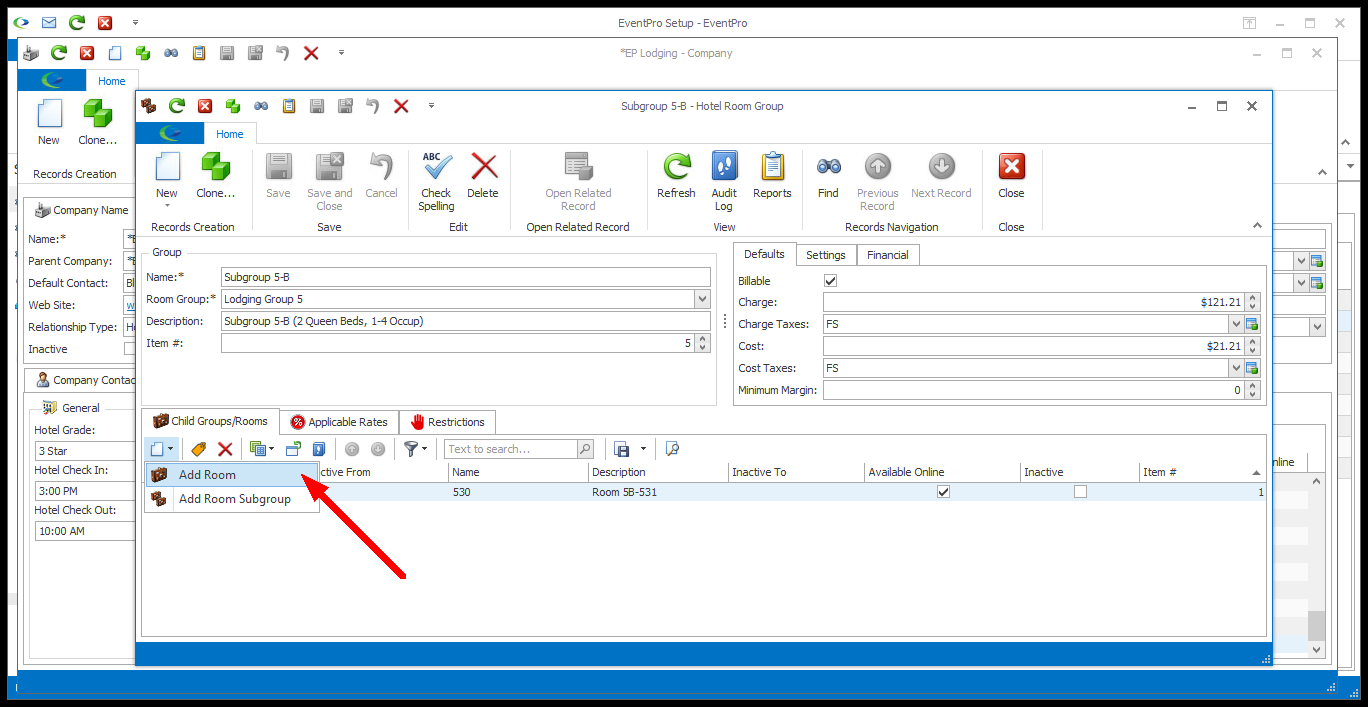
b.You can also double-click to open the Group or Subgroup edit form at the level where you want to add rooms.
The Hotel Room edit form will be the same with this method, but you will need to Save back through an extra level when you are done, i.e. Save the Room edit form, then the Group/Subgroup edit form, and finally the Hotel/Company edit form.
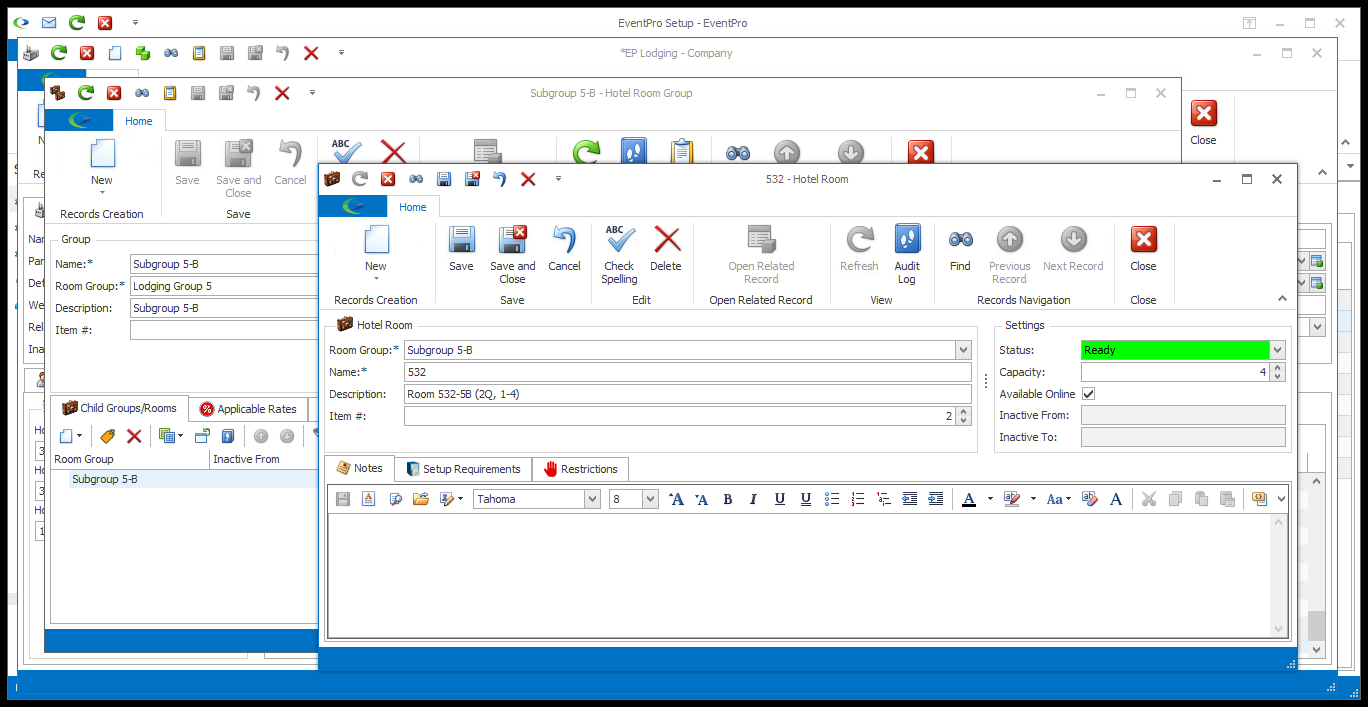
2.The Hotel Room edit form opens.
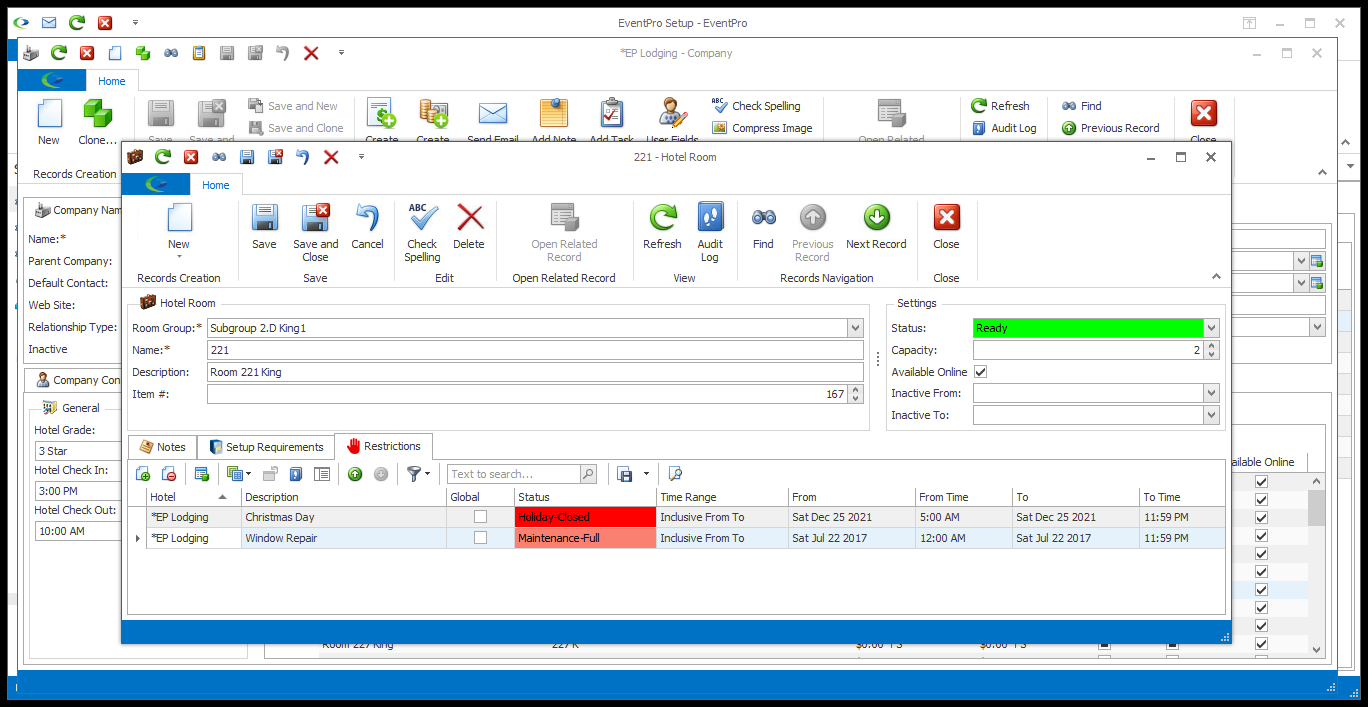
3.Follow the instructions below for each area and tab of the Hotel Room edit form:
•Room Group: This should already be set to the Hotel Room Group or Subgroup that you selected when starting this Room record. If it is not correct, select another option from the drop-down.
•Name: Enter a name for this Hotel Room.
•Description: Enter a Description for this Hotel Room.
•Item #: Item numbers allow you to determine a sort order for the Rooms within the Group or Subgroup. An Item # will default in, but you can change it. |
•Status: Select the default Status for this room from the drop-down: Ready, Occupied, Needs Cleaning, or Unavailable.
oThis will be the Room's initial Status in the Hotel Room Management screen.
oDon't confuse Room Status with Room Booking Status. Room Status refers to the state of the physical room (Ready, Occupied, Needs Cleaning, Unavailable) for the purposes of the Hotel Room Management screen, whereas the Room Booking Status describes the progress of the room reservation with the user-defined Accommodation Statuses such as Tentative, Confirmed, etc.
•Capacity: Enter the Capacity for this specific Room.
•Available Online: Earlier, you decided whether the higher-level Group and/or Subgroup containing this Room was available online in EPConnect.
oYou can now specify whether this individual Room is Available Online.
oRemember that the EPConnect Suite is a collection of separately available modules, and you will not see its related tabs and screens if you have not purchased it.
•Inactive From and Inactive To: If this Room will be inactive for a period of time, select the Inactive From and Inactive To dates from the drop-down calendars.
oThese fields will be unavailable if the Group/Subgroup containing this Room already has an Inactive From-Inactive To date range set.
oWhen customizing Lodging Calendar Views, the "Hide Inactive Rooms" setting determines whether currently Inactive Rooms are displayed or hidden. |
•Under the Notes tab, enter any general notes you have about the Room.
•Under the Setup Requirements tab, add any notes or special information about the Room that would be useful to Setup Staff.
•For both Notes and Setup Requirements, you can simply type directly into the memo field in the tab, or if you want to add more sophisticated formatting, you work in the Word Processor.
oReview how to use the Word Processor under Common Procedures > Word Processor. |
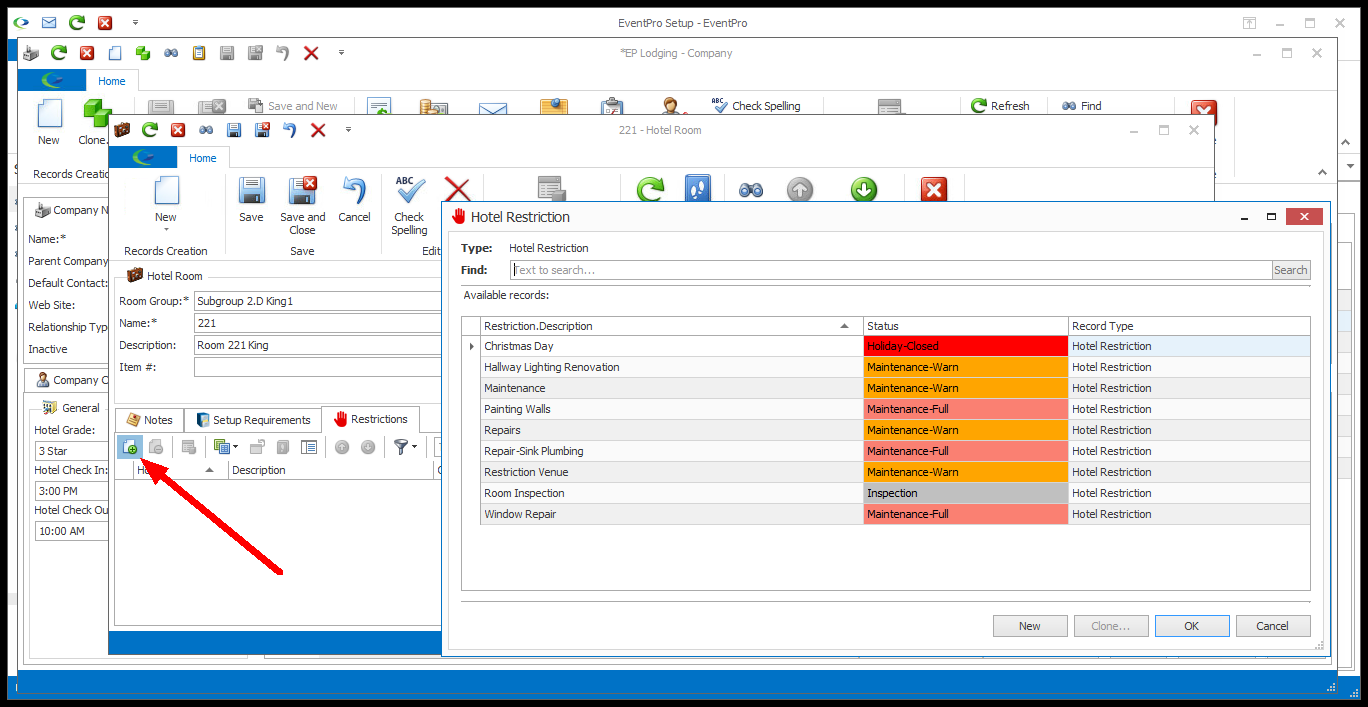
•Under the Restrictions tab, you can link a Restriction that applies to this specific Room.
oIf the Restriction actually applies to the entire Group or Subgroup that contains this room, review Add Room Group and Add Room Subgroup.
oIf the Restriction applies to the entire Hotel, you would add it as a Global restriction under Hotel Restrictions.
•Before you start adding Restrictions to this tab, ensure that they have already been added to the Hotel under Hotel Restrictions.
•To add a restriction to this Room, click the Link button under the Restrictions tab.
•The Hotel Restriction window appears. This window contains the Hotel Restrictions added to the Hotel.
•Select the Restriction you want to apply. To link multiple Restrictions at once, hold the Ctrl key and click on the applicable Restriction records.
•Click OK.
•You will return to the Hotel Room edit form, where the selected Restrictions have been linked.
•Click the Save button at the top of the Hotel Room edit form to ensure that your changes have been saved. You can link more Restrictions under this tab if you require. |
4.When you have added all the information you need for this Hotel Room, click Save and Close.
5.Depending on where you started, you will either end up back in the edit form for the Group/Subgroup from which you started this Room, or all the way back in the Hotel/Company edit form.
Either way, ensure that you click Save in all edit forms to save the changes you made.
6.From here, you can continue setting up your Lodging Room Groups, Room Subgroups and Rooms, as required:
a.Add Room Group
b.Add Room Subgroup
c.Add Room