|
Breadcrumb Trail: EventPro Setup > Facilities (Venue/Hotel) > Hotel Information > Rooms Add Room Subgroup (Lodging) |
Scroll Prev Top Next More |
1.If you want to further sub-divide your Hotel Room Groups, you can add Room Subgroups.
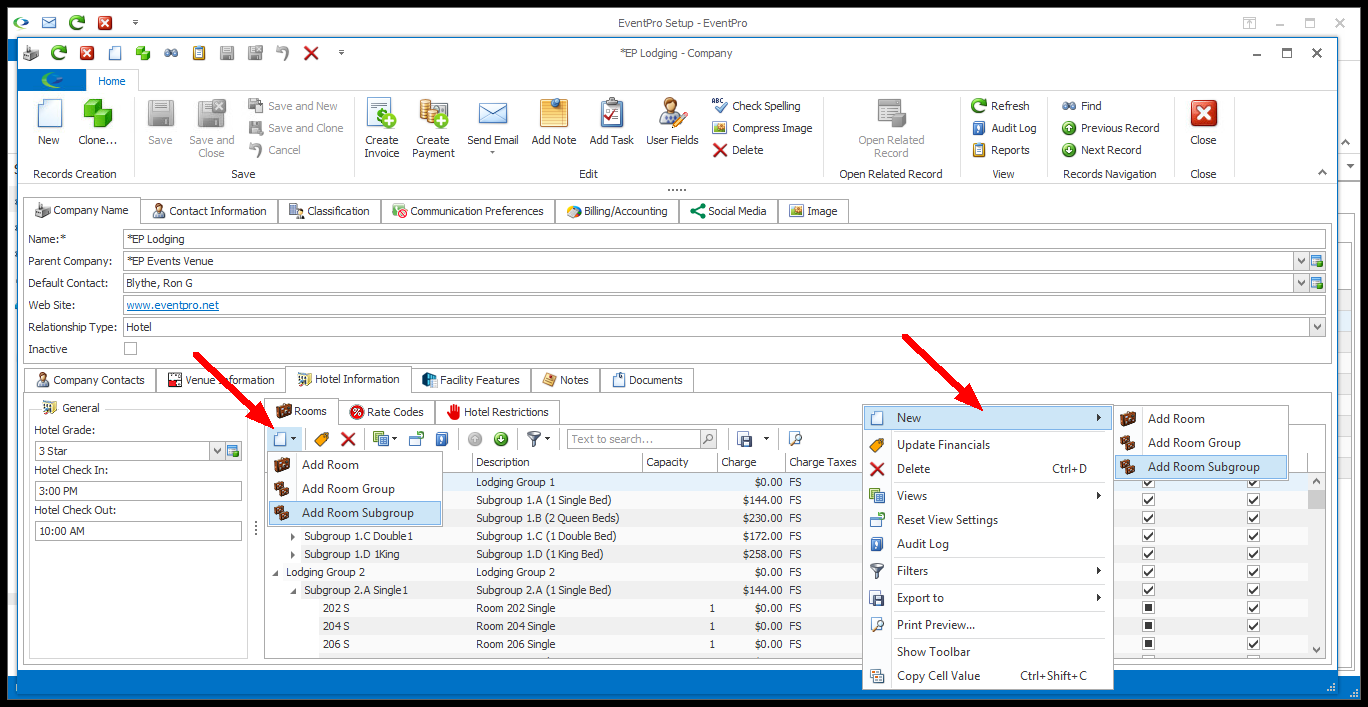
2.Under the Hotel Information > Rooms sub-tab of the Hotel/Company edit form, select the Room Group to which you want to add a Subgroup.
3.From the New drop-down, select Add Room Subgroup, or right-click the Room Group and select New > Add Room Subgroup from the speed menu.
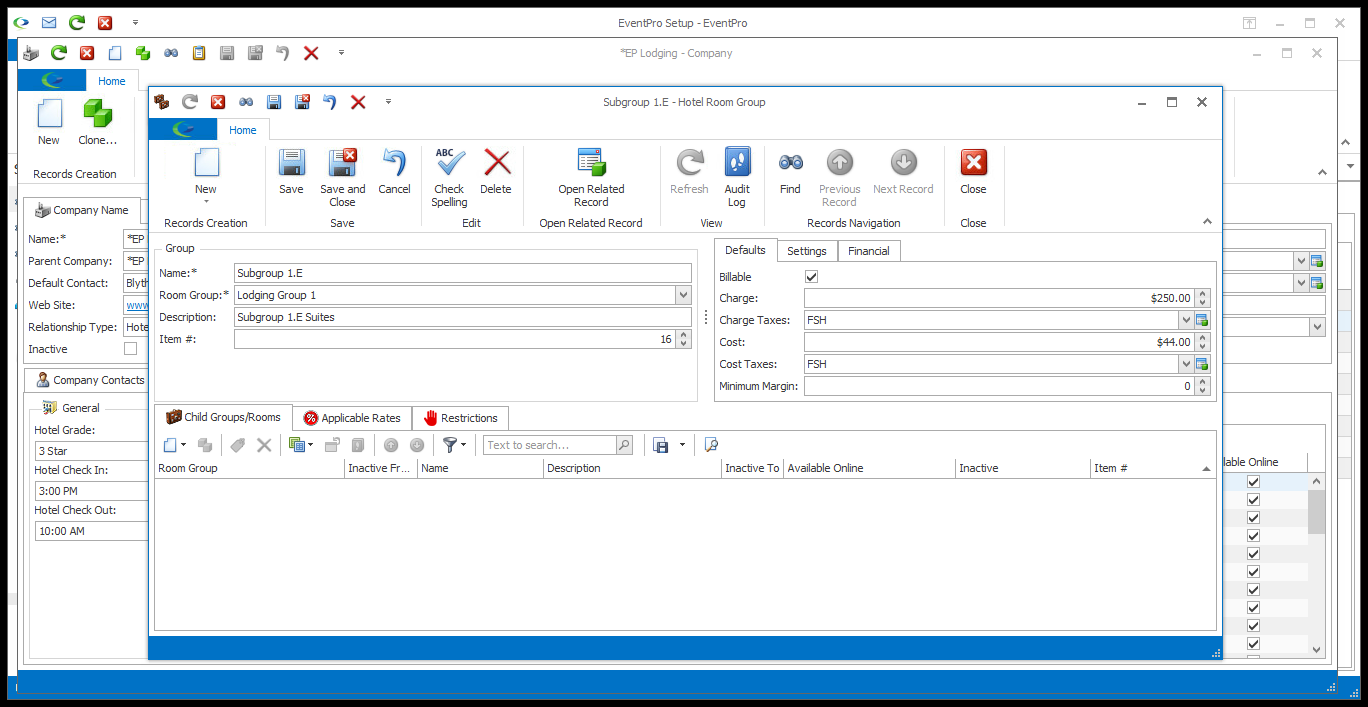
4.The new Hotel Room Group edit form appears.
This edit form looks the same as a Hotel Room Group edit form. The edit form is not titled "Subgroup" but you can tell it is a Subgroup because there is a Room Group selected, meaning that the Subgroup you are currently creating is going to be under that selected Room Group.
(As you will recall, a top-level Hotel Room Group does not have a Room Group selected.)
5.Follow the instructions below for each area and tab of the Hotel Room (Sub)Group edit form:

•Name: Enter a name for this Hotel Room Subgroup. •Room Group: Because you are creating a Subgroup, you need to select a higher-level Hotel Room Group from this drop-down. The Room Group should already be set to the Room Group you selected before starting this Subgroup record. However, you can select a Room Group from the drop-down, if necessary. 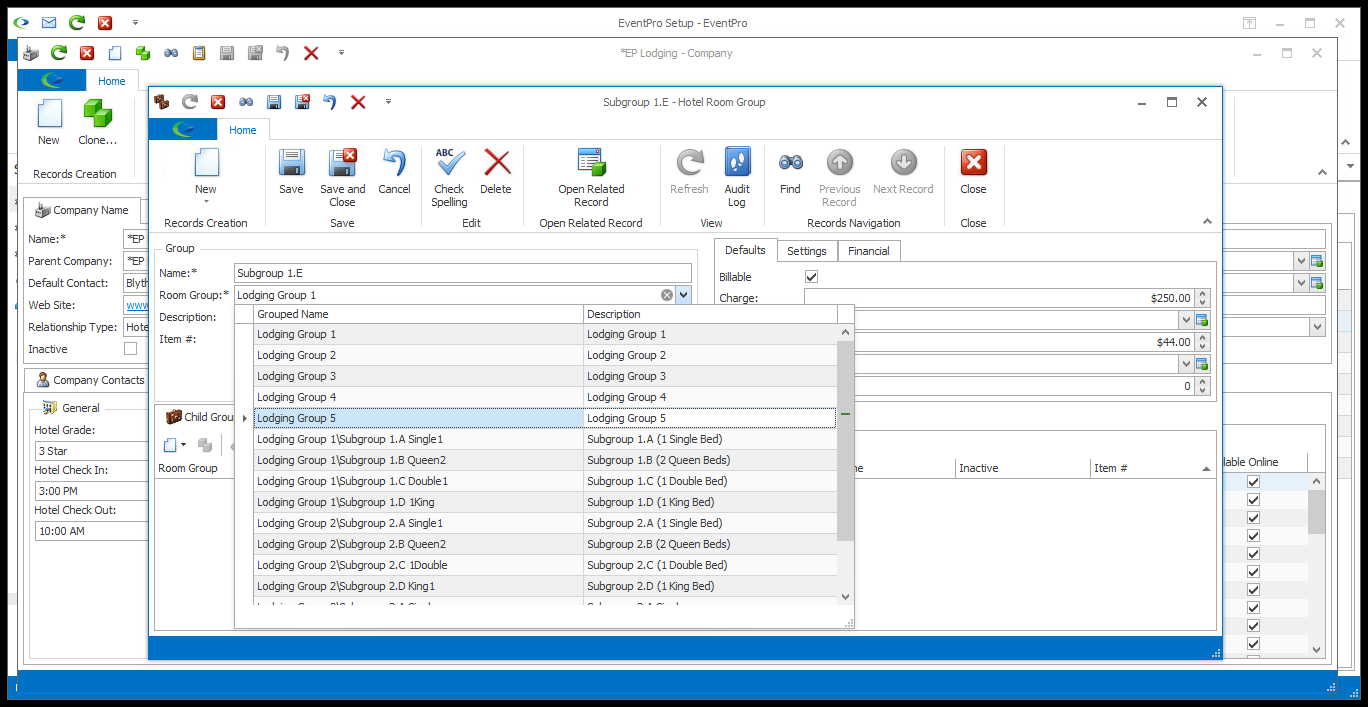 •Description: Type in a Description of this Subgroup. •Item #: Item numbers allow you to determine a sort order for the Subgroups. An Item # will default in, but you can change it. |
•If you add Charge and Cost Defaults to this Subgroup, those defaults will apply to all Rooms within this Subgroup, as well as any further (sub-)Subgroups added, unless you specify a different Default Cost/Charge on those lower-level Subgroups. •Rooms use the defaults from the grouping level directly containing them, if available. oSo, for example, if a Room is grouped under Lodging Group 1 > Subgroup 1.A > Subgroup 1.A.i, and the Group/Subgroups have different Default Charges/Costs, the Room would use the Default Charge/Cost from the Subgroup 1.A.i, if available. •If you leave this Subgroup's Charge/Cost Defaults blank, Rooms added within this Subgroup will use the Charge/Cost Defaults of the next Group or Subgroup level immediately above. oFor example, if a Room is once again grouped under Lodging Group 1 > Subgroup 1.A > Subgroup 1.A.i, but Subgroup 1.A.i has no Default Charge/Cost set, the Room would use the Default Charge/Cost from Subgroup 1.A., the next level up.
•Billable: Select this checkbox to indicate that the Rooms under this Subgroup are, by default, Billable. Non-billable items will not show up in invoices. •Charge: Enter the default Charge that applies to Rooms under this Subgroup. •Charge Taxes: Select the Taxes that will apply by default to the Charge. The drop-down is populated by the Tax Configurations set up under EventPro Setup > Financial > Taxes. •Cost: Enter the default Cost that applies to Rooms under this Subgroup. •Cost Taxes: Select the Taxes that will apply by default to the Cost. •Allow Discount: Select this checkbox if you want to allow Users to discount the charge for Rooms in this Subgroup. •Min. Margin: If required, enter a default Minimum Margin percentage for the Rooms in this Subgroup. This prevents Users from discounting the Charge below the set margin. 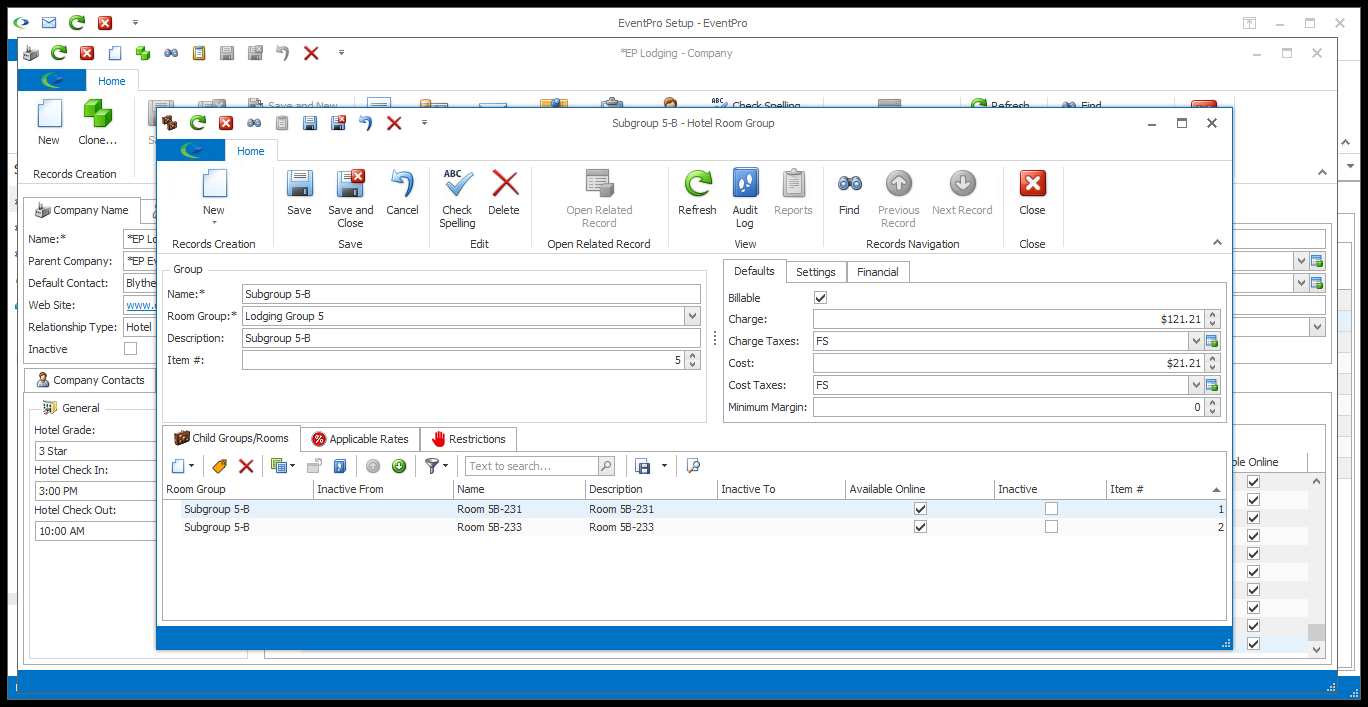 |
•These default Settings will apply to all Subgroups and Rooms under this Room Subgroup. •However, you will later be able to adjust the Settings for each separate Room Subgroup, and determine online availability for each individual Room.
•Available Online: Select this checkbox if all the Subgroups and Rooms in this Group will be, by default, available online in EPConnect. 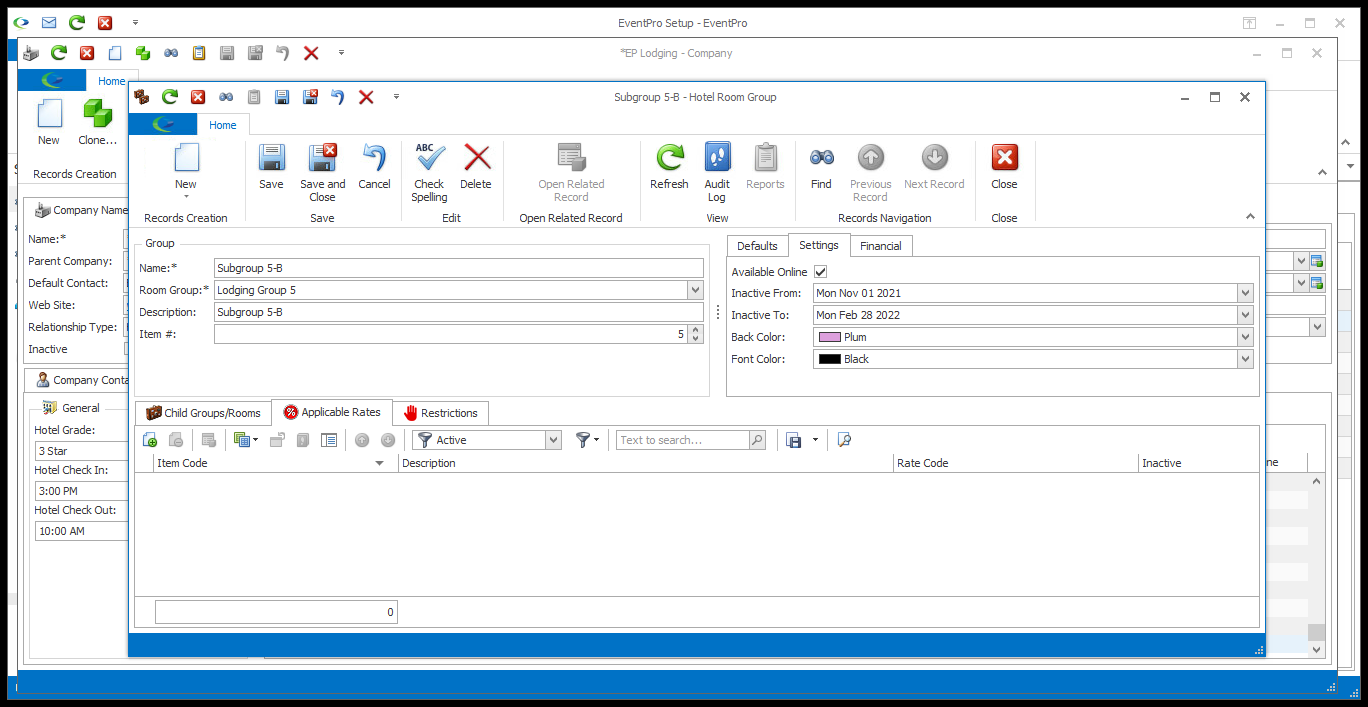 Remember that the EPConnect Suite is a collection of separately available modules, and you will not see its related tabs and screens if you have not purchased it. •Inactive From and Inactive To: If this Room Subgroup will be inactive for a period of time, select the Inactive From and Inactive To dates from the drop-down calendars. oThese fields will be unavailable if the Group containing this Subgroup already has an Inactive From-Inactive To date range set. oWhen customizing Lodging Calendar Views, the "Hide Inactive Rooms" setting determines whether currently Inactive Rooms are displayed or hidden. •Back Color and Font Color: Select the background and font colors for the records related to this Subgroup. The color coding will be visible in selection grids and graphical calendars. |
•This default Financial information will apply to all Rooms within this Room Subgroup, as well as any further Subgroups in the Subgroup, unless you change the Financial settings for an individual Room Subgroup. •You may have set Financial defaults in the Room Group above this Subgroup, but the Financial settings you select here will apply to this specific Subgroup.
•Financial Subgroup: Select the Financial Subgroup for this Hotel Room Subgroup. oThe Financial Subgroups in this drop-down were set up under EventPro Setup > Financial > Financial Subgroups. oWhen you select a Financial Subgroup, you may notice that selections for the fields below - Financial Category, Department Code, Income Budget Item, and Expense Budget Item - default in. If so, it is because defaults were selected for those fields when setting up the Financial Subgroup. Review the Defaults for the Financial Subgroup. 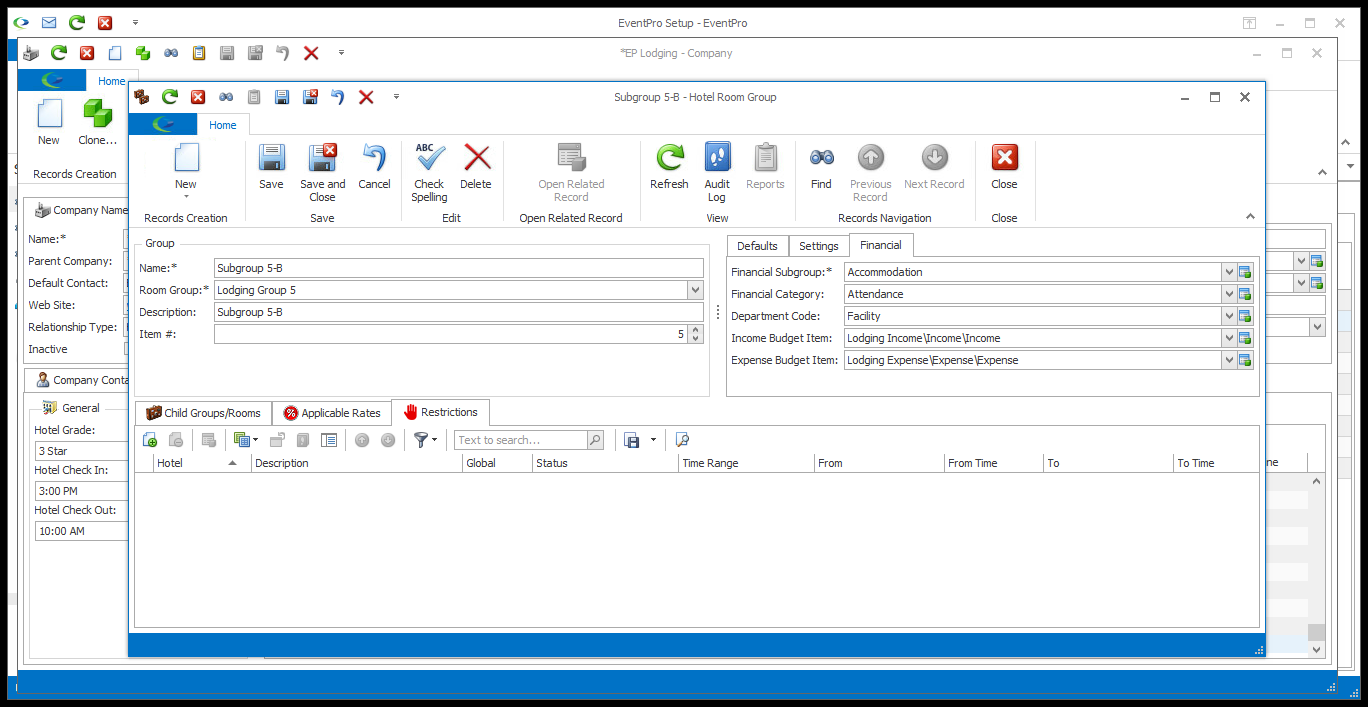 •Financial Category: If there is no default set, or you want to change the default, you can select the default Financial Category that applies to this Subgroup. You created Financial Categories earlier under EventPro Setup > Financial > Financial Categories. •Department Code: If there is no default set, or you want to change the default, you can choose the Subgroup's default Department Code from the drop-down. You created department codes under EventPro Setup > Financial > Department Codes. •Income Budget Item and Expense Budget Item: If there are no defaults set, or you want to change the defaults, you can select the default Income Budget Item and/or Expense Budget Item for this Subgroup. You set up your budget items earlier under EventPro Setup > Financial > Budget Configuration. |
•Under the Child Groups/Rooms tab, you can add the Rooms that are gathered under this Room Subgroup. •You can also add a Subgroup within the current Subgroup, creating another level of Room division. Remember, you can sub-divide your Hotel Room organization structure as much as you want, but be sure to exercise caution when creating subgroups within subgroups - it can start to get a bit confusing. •If you don't want to add Rooms/Subgroups to the Hotel Room Subgroup at the moment, you can Save and Close the Hotel Room Subgroup edit form and return to add Rooms/Subgroups later. •If you are ready to add Rooms or Subgroups to the Room Subgroup now, first Save the Hotel Room Subgroup edit form (click Save in the top ribbon).
•Start a New record under the Child Groups/Rooms tab. oNOTE: The New drop-down has two options: Add Room and Add Room Subgroup. oEnsure you select the option you want, as the edit forms are different. •Add Room Subgroup: If you select this option, another Hotel Room Group edit form will open. To continue, refer back to the beginning of these Add Room Subgroup instructions. 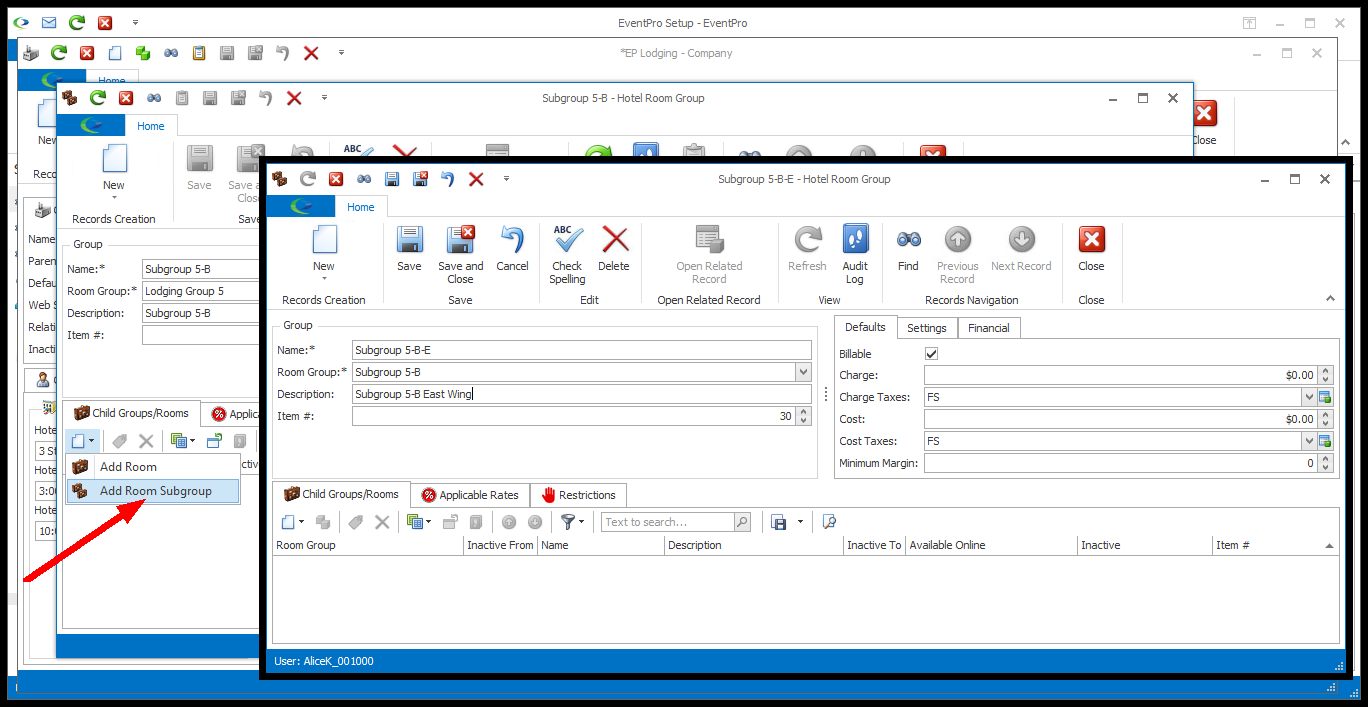 •Add Room: If you select Add Room, the Hotel Room edit form opens. To continue, refer to the instructions below under Add Room. 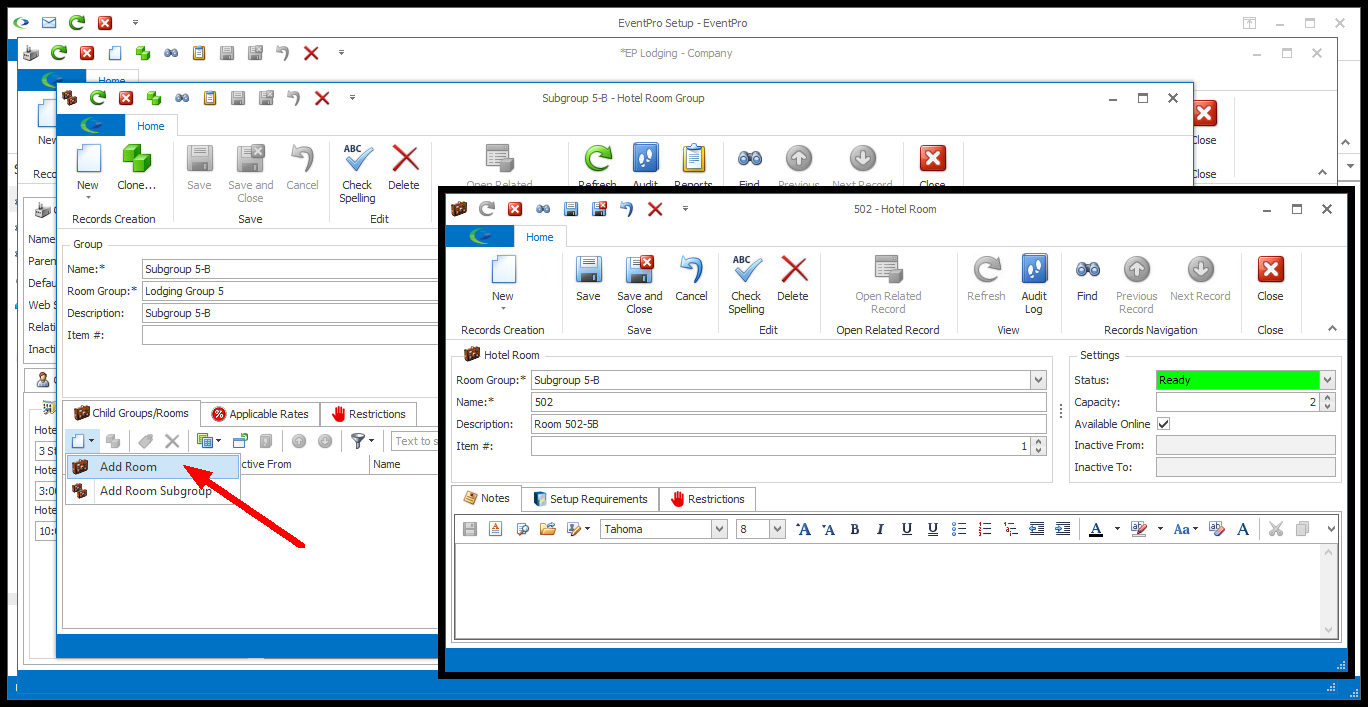 |
•Under the Applicable Rates tab, you will choose which of the Hotel Rate Codes are applicable to this Room Subgroup. •The Rates you set for this Room Subgroup are applicable to all (sub-)Subgroups and Rooms within this Subgroup. Note however, you can also set applicable rates specific to individual Room Subgroups within this Subgroup. •You may also have applied Rate Codes to the Room Group containing this Subgroup. oA Group's Rates are applicable to all of its Subgroups and Rooms contained within. oHowever, a Subgroup's Rates do not apply back up to the higher level Group or Subgroup that contains it. oA Subgroup's Rates apply to itself and any lower level Subgroups and Rooms it contains. •For example, let's say you have Lodging Group 1 subdivided into Subgroup 1.A and Subgroup 1. B (further divided into Subgroups 1.B.North and 1.B.South), with the following Rate Codes assigned:
•Click the Link button •The Hotel Rate Code window opens. These are the Rates you defined under the Hotel's Rate Codes tab. 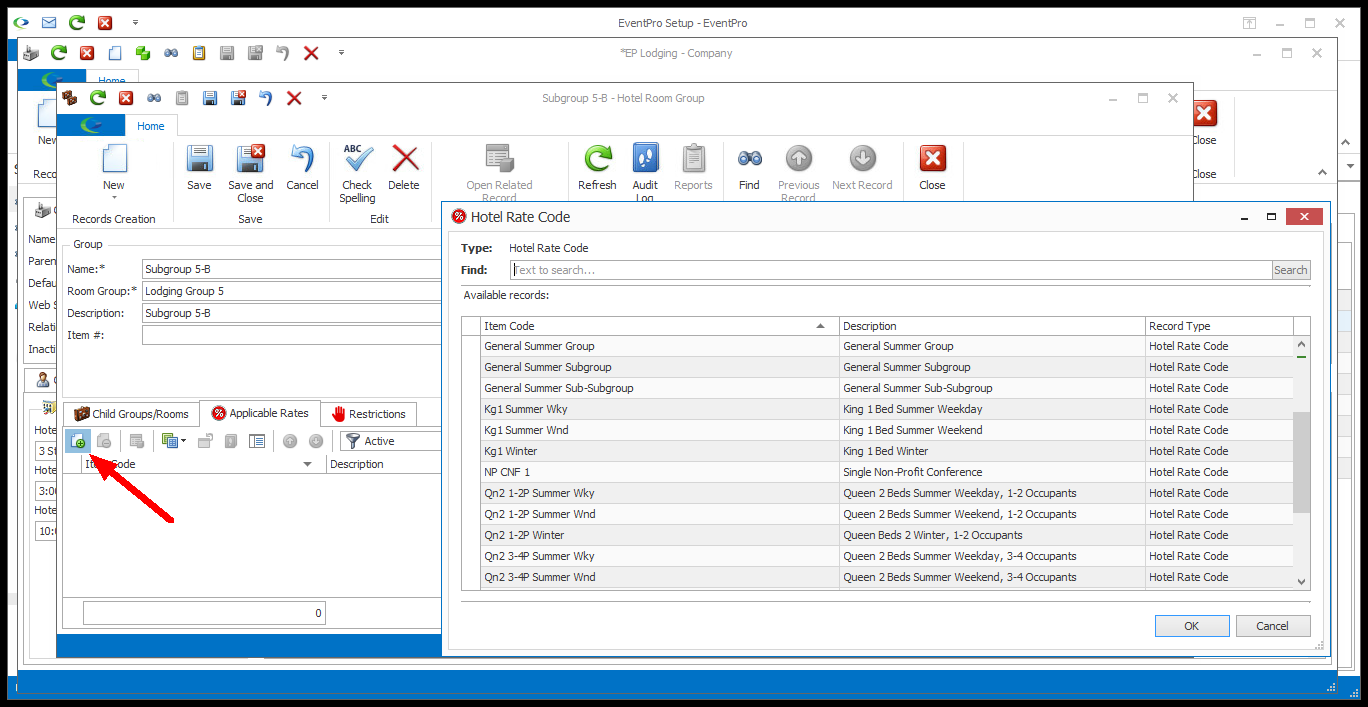 •Select the Rate Code you want to apply to this Subgroup. •If you want to link multiple Rates at once, hold down the Ctrl key and select all of the relevant Rates for this Group. •Click OK. •The Rates will be added under the Subgroup's Applicable Rates tab. You can link more Rates as required. •Note that these Rates are linked back to the Hotel's Rate Codes tab. If you open and edit the rate codes here, under the Subgroup's Applicable Rates tab, it will also change the same rates back under the Hotel's Rate Codes tab. 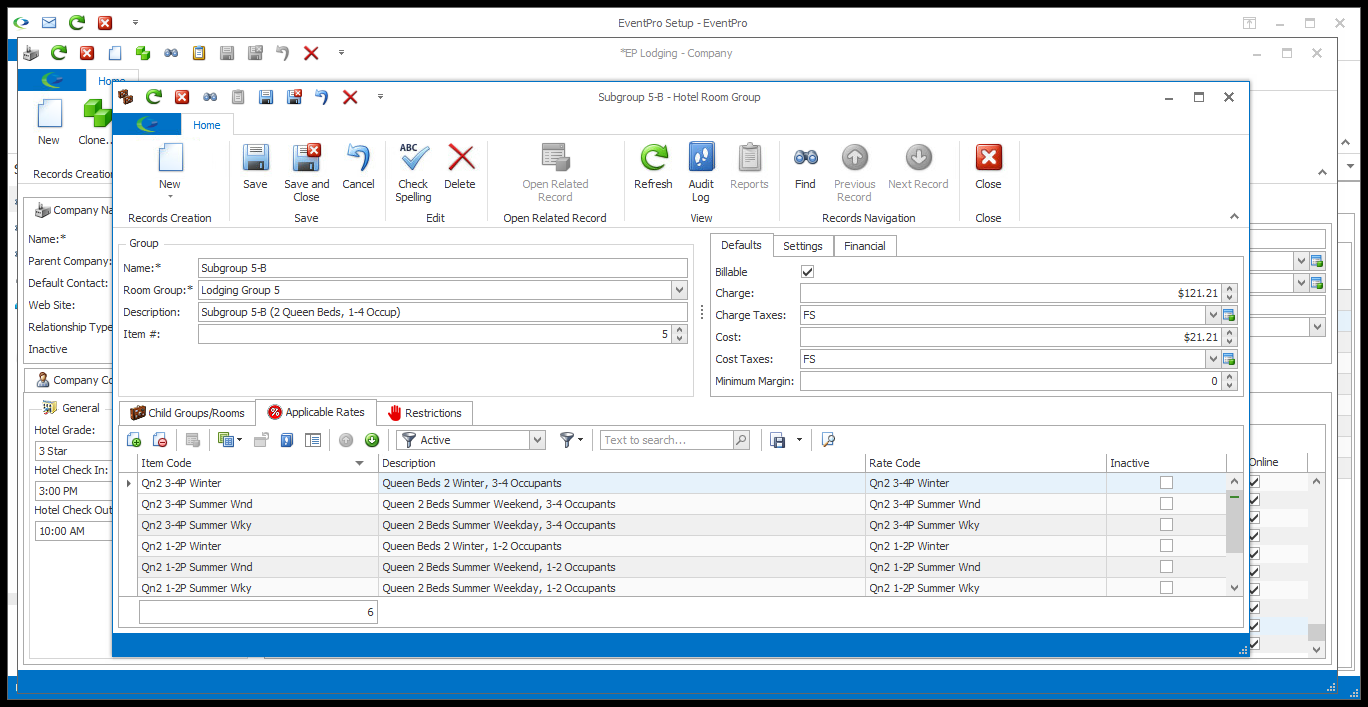 |
|||||||||||||||

•Under the Restrictions tab, you can link a Restriction that applies to the entire Room Subgroup. oIf you want a Restriction to only apply to an individual Room, you can add it later. See Add Room. oIf the Restriction actually applies to the Group above this Subgroup, review Add Room Group. oIf the Restriction applies to the entire Hotel, you would add it as a Global restriction under Hotel Restrictions. •Before you start adding Restrictions to this tab, ensure that they have already been added to the Hotel under Hotel Restrictions.
•Click the Link button •The Hotel Restriction window appears. 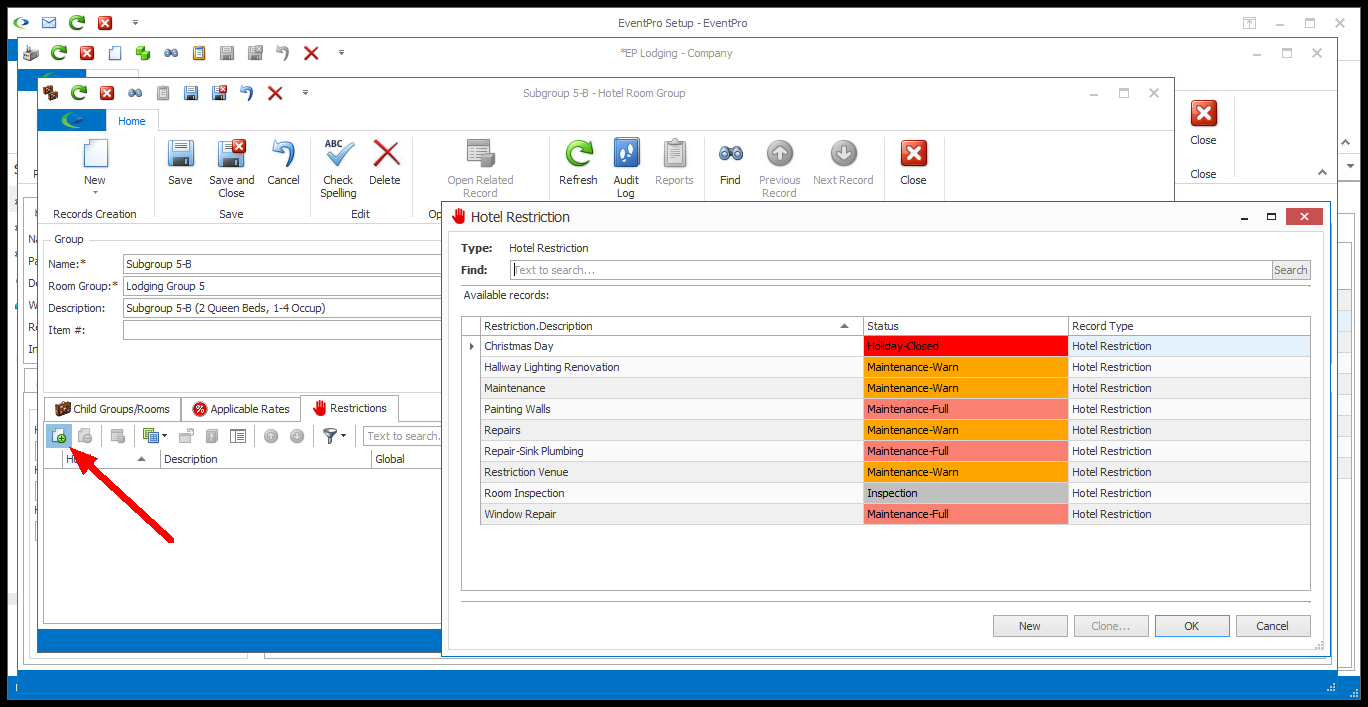 •Select the Restriction you want to apply. To add multiple Restrictions at once, hold the Ctrl key and click on the applicable Restriction records. •Click OK. •You will return to the Hotel Room Subgroup edit form, where the selected Restrictions have been linked. 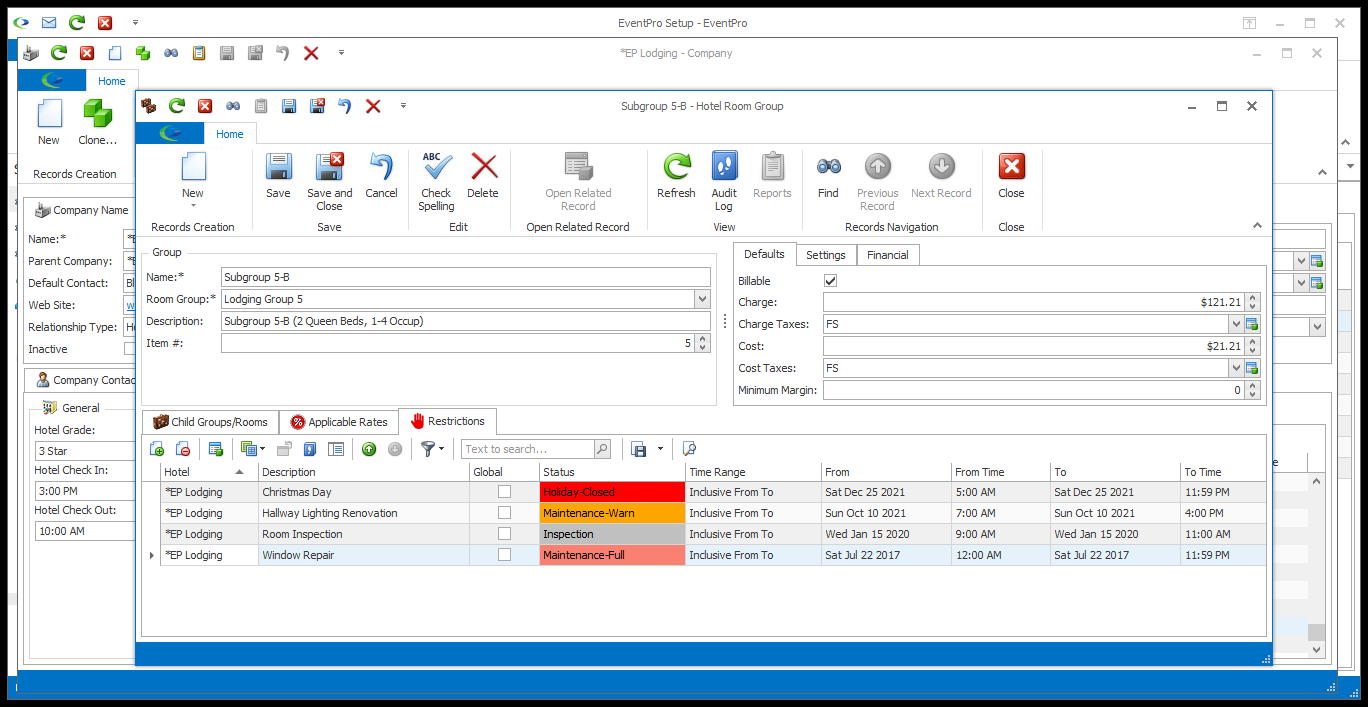 •Click the Save button at the top of the Hotel Room Subgroup edit form to ensure that your changes have been saved. •You can link other Restrictions under this tab if you require. Just remember to click Save at the top of the Hotel Room Subgroup edit form to ensure that all changes have been saved. |
6.When you have added all the information you need for this Hotel Room Subgroup, click Save and Close.
7.You will return to the Hotel/Company edit form. Ensure that you click Save in the Hotel/Company edit form, as well.
8.From here, you can do a few different things, depending on how you want to organize your Hotel Setup:
a.Add more top-level Groups: Add Room Group
b.Add more Subgroups: Add Room Subgroup
c.Add Rooms: Add Room
© 2023 EventPro Software, a wholly owned subsidiary of Profit Systems Inc. All Rights Reserved.